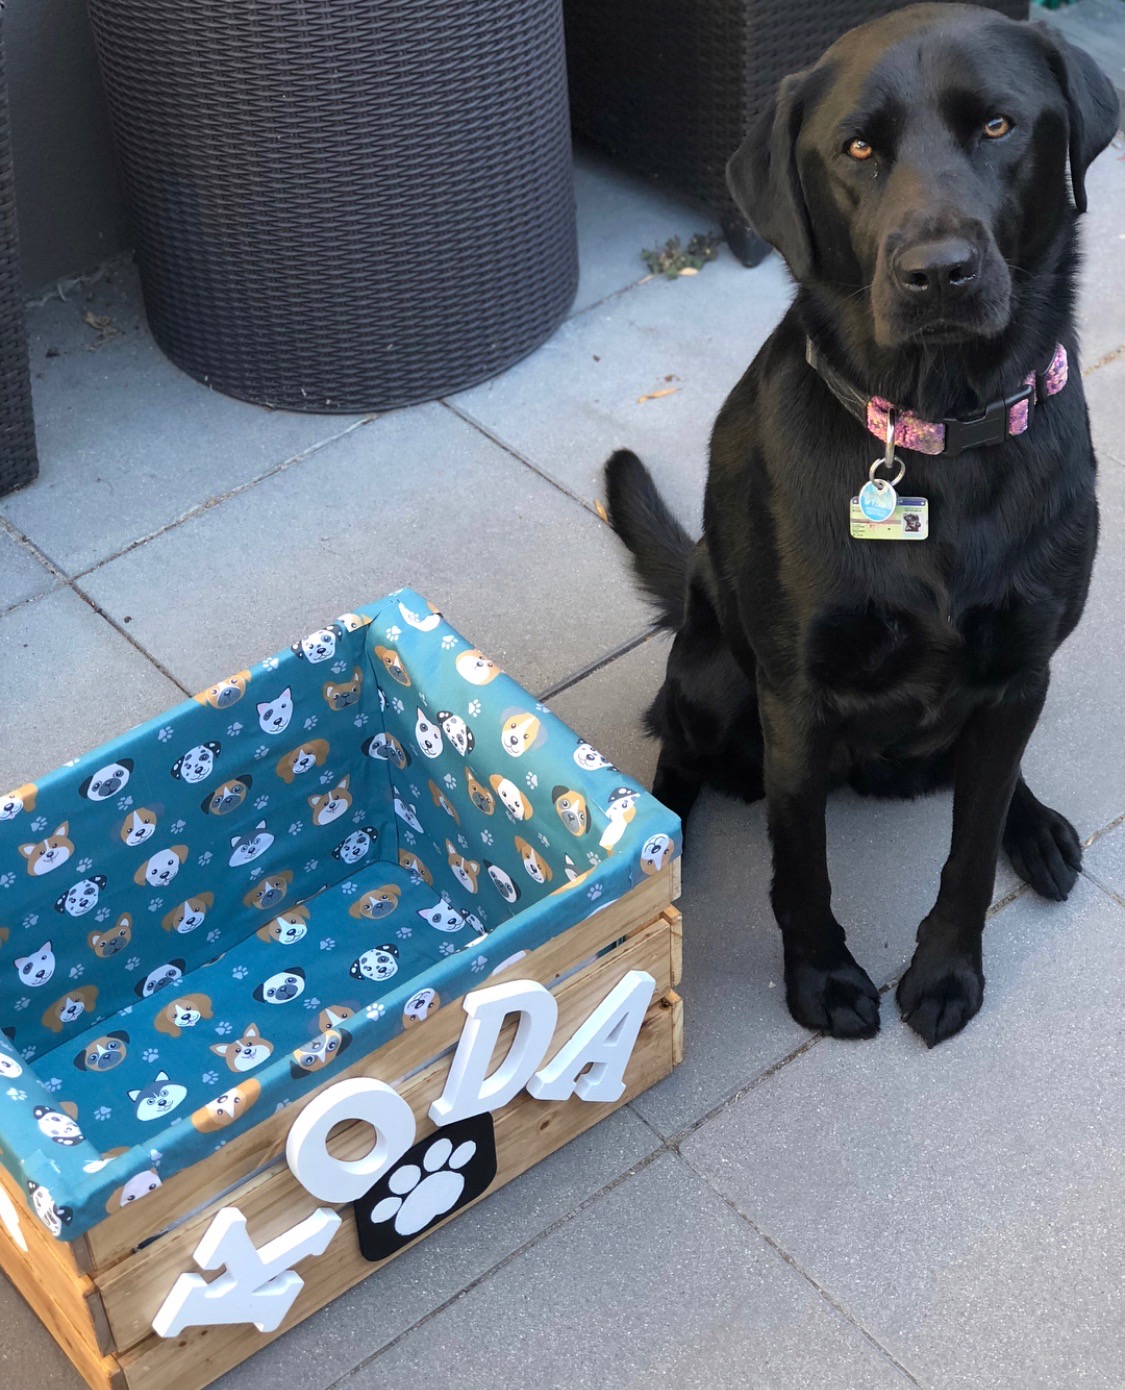
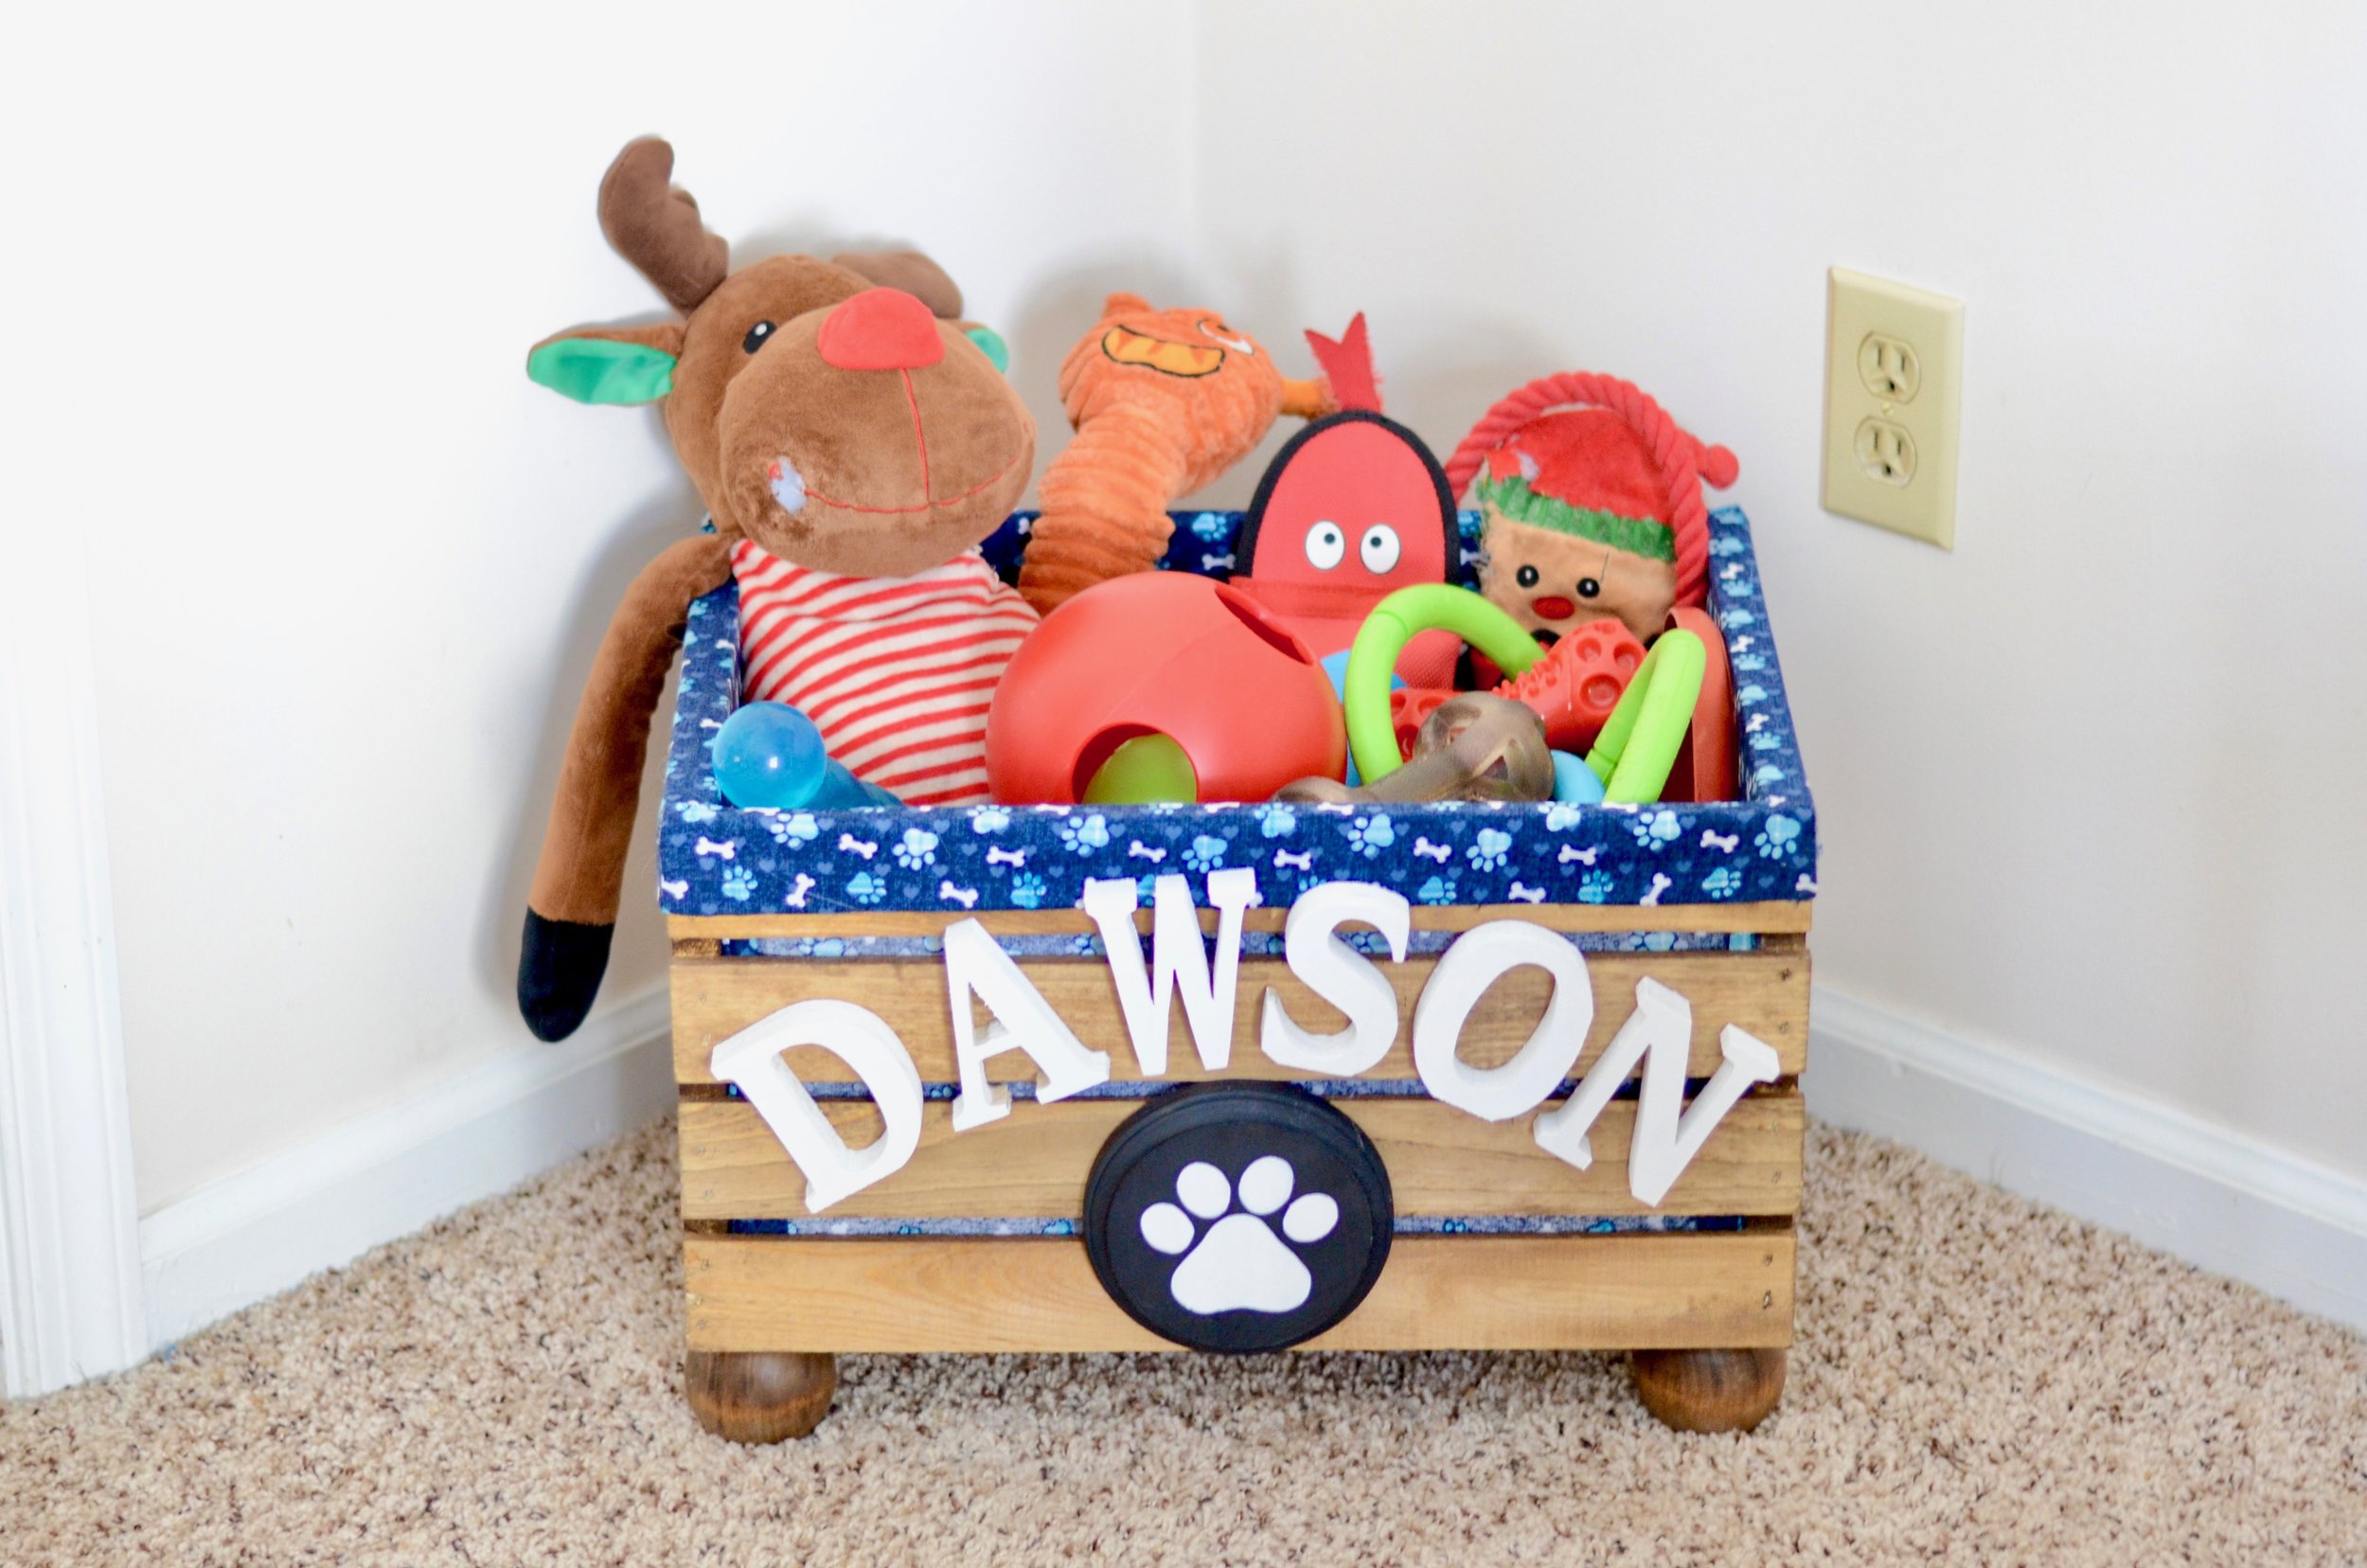
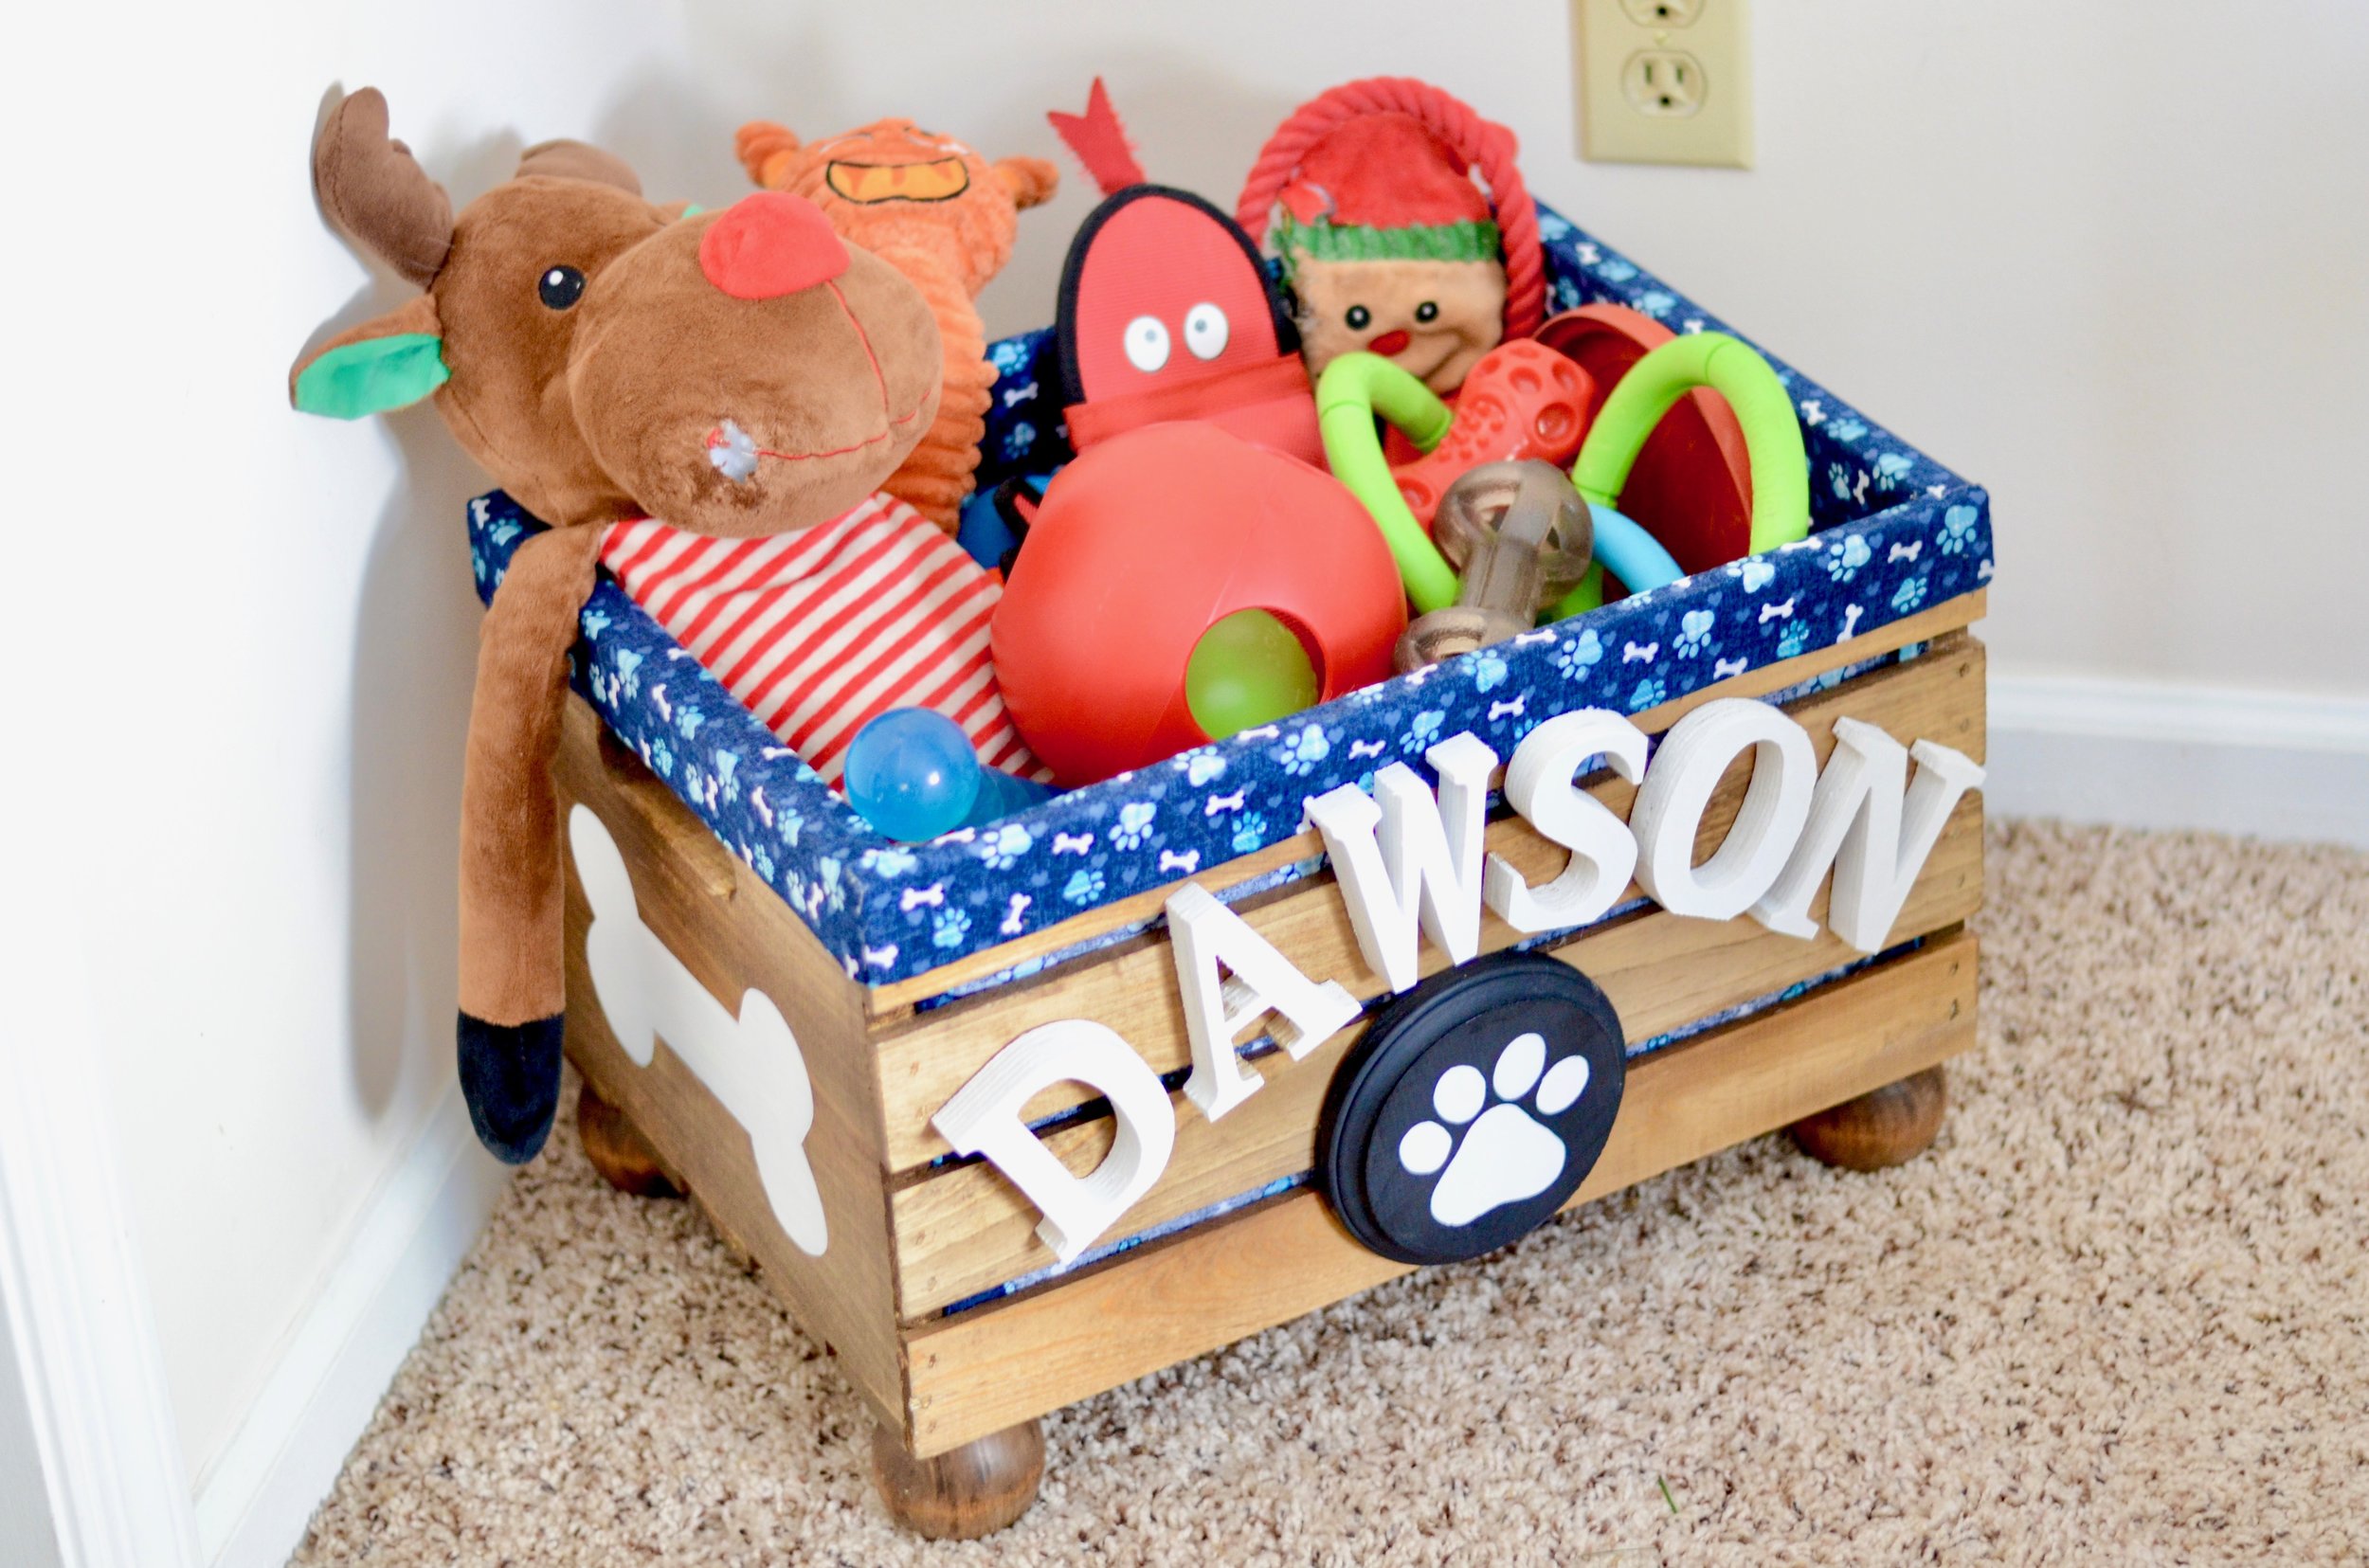
Hi everyone! Today, I am sharing a super fun DIY project! If you've seen my Instagram, then you are probably familiar with my Golden Retriever, Dawson, and how completely obsessed I am with him! His toy collection is slowly starting to grow larger and larger (especially after how spoiled he was on Christmas by family and friends), so it recently outgrew its old toy basket. I did quite a lot of searching on the internet to try to find the perfect toy box to order for him, but I wasn't super satisfied with the selection I was able to find and most of them were way too small to suit what I was looking for. I did come across a bunch of different cute ones, but the problem was that they were made out of a cloth-like or burlap material and anyone who has a 80-lb puppy should know that's an open invitation for chewing haha. Dawson's very first toy box was made out of burlap and the handles were rope, and he just loved nibbling on the toy box itself. After this toy box, we upgraded to a wicker basket with a large handle that crossed over the top and connected two of the sides (like an Easter basket). It was fun while it lasted and we didn't have any issues with him trying to nibble this one, but like I said it's too small now for the amount of toys he has and it was tough sometimes for him to get a toy out because he had to duck under the handle to get to the ones in the middle. So for his new toy box, I wanted something large enough to hold all of his toys, accessible for him to reach inside of without any issues, and made of sturdy material. I decided to go with a plain, unfinished, wooden crate that I could customize for my boy!
Materials:
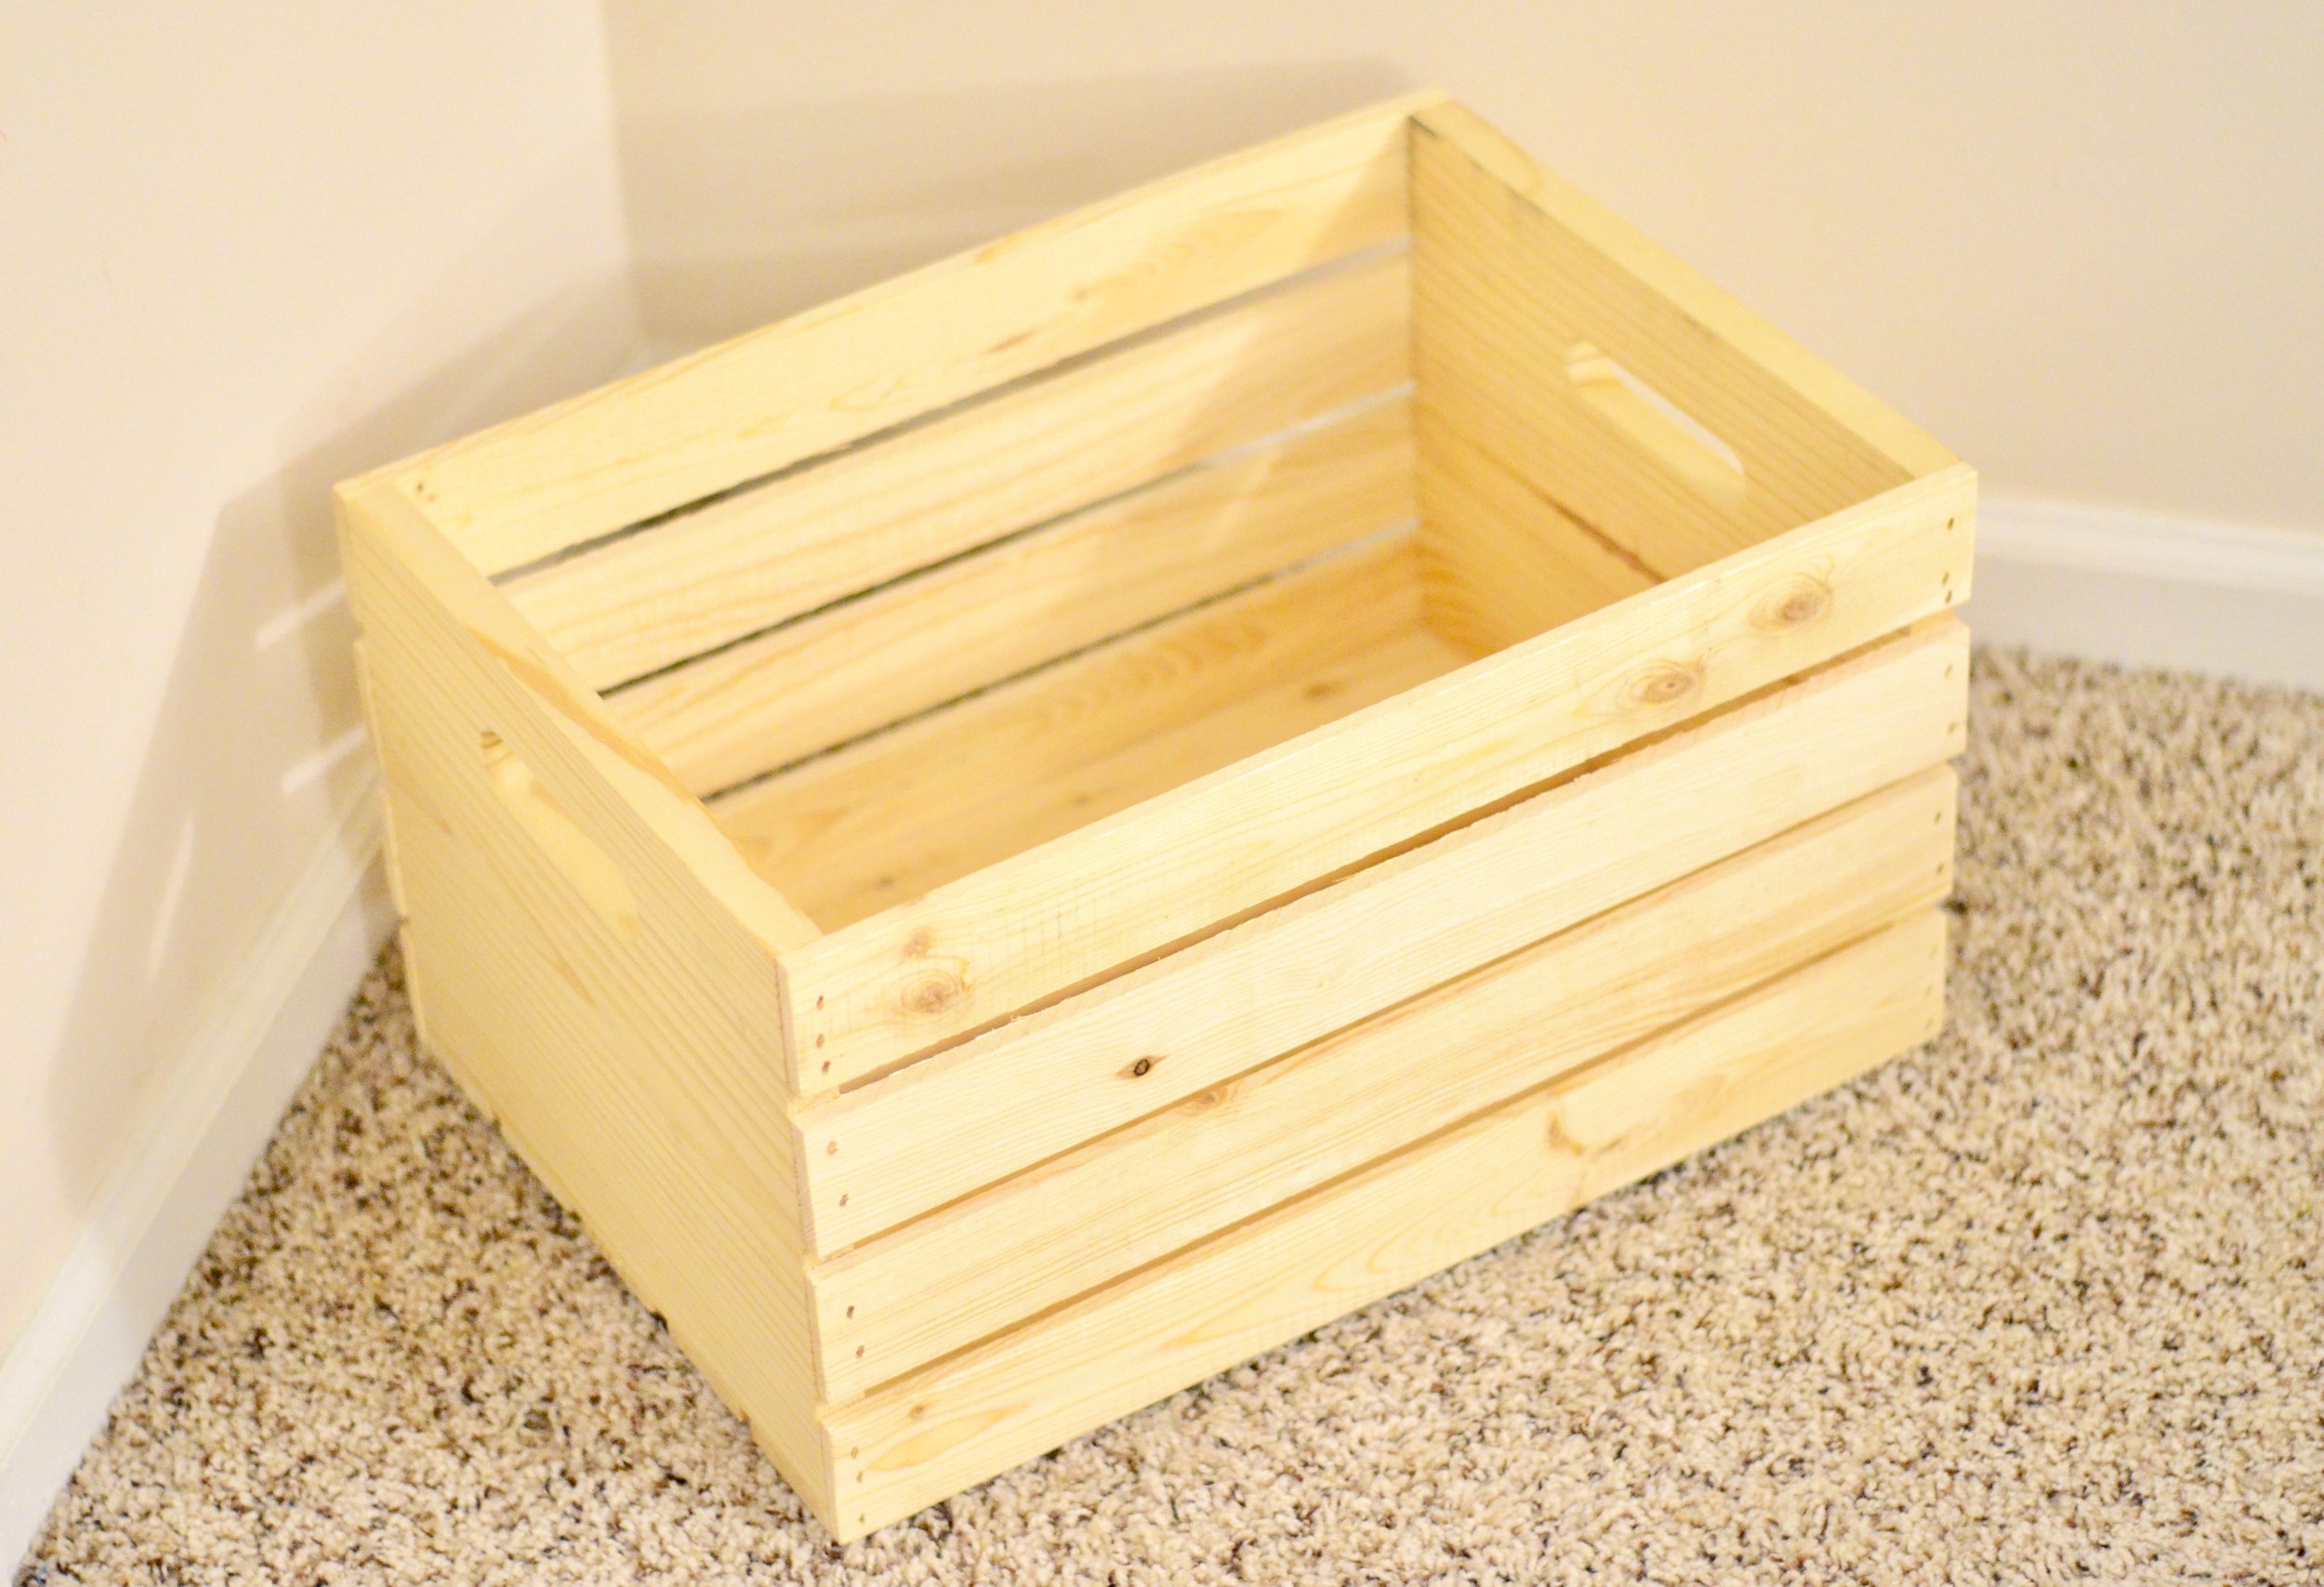
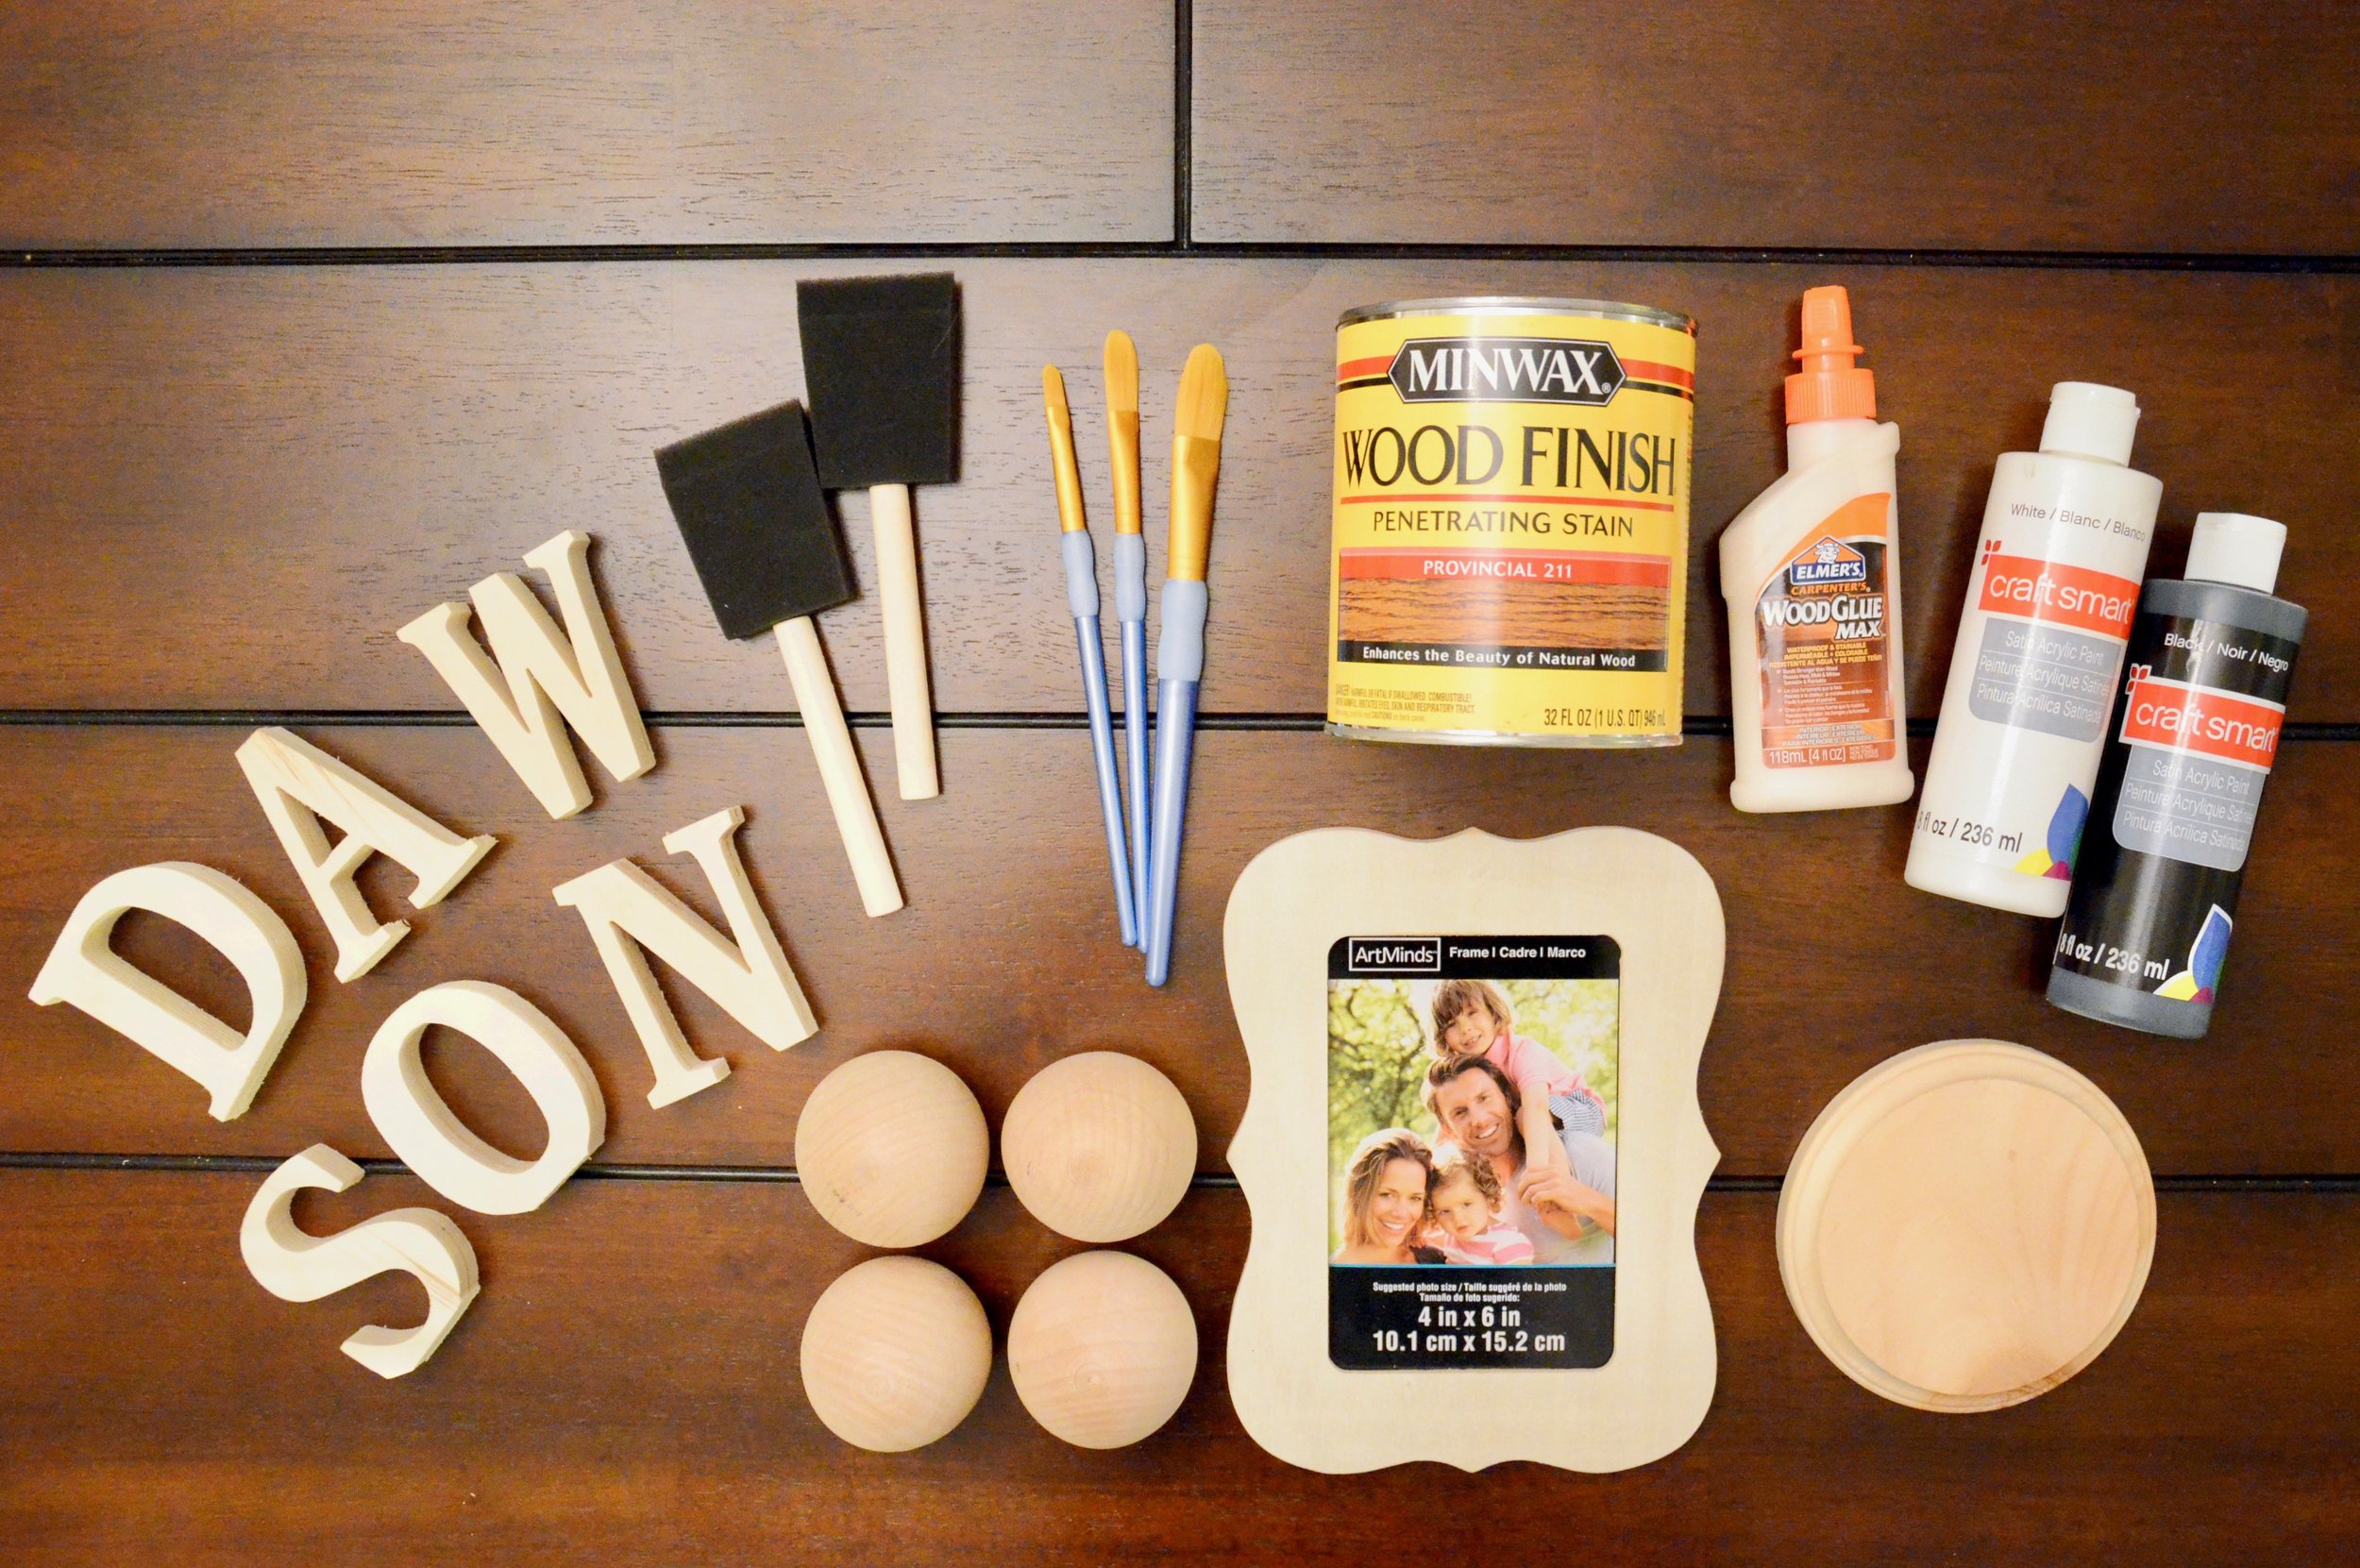
- 1 unfinished pine crate (12 1/2" x 9 5/8" x 17 7/8")
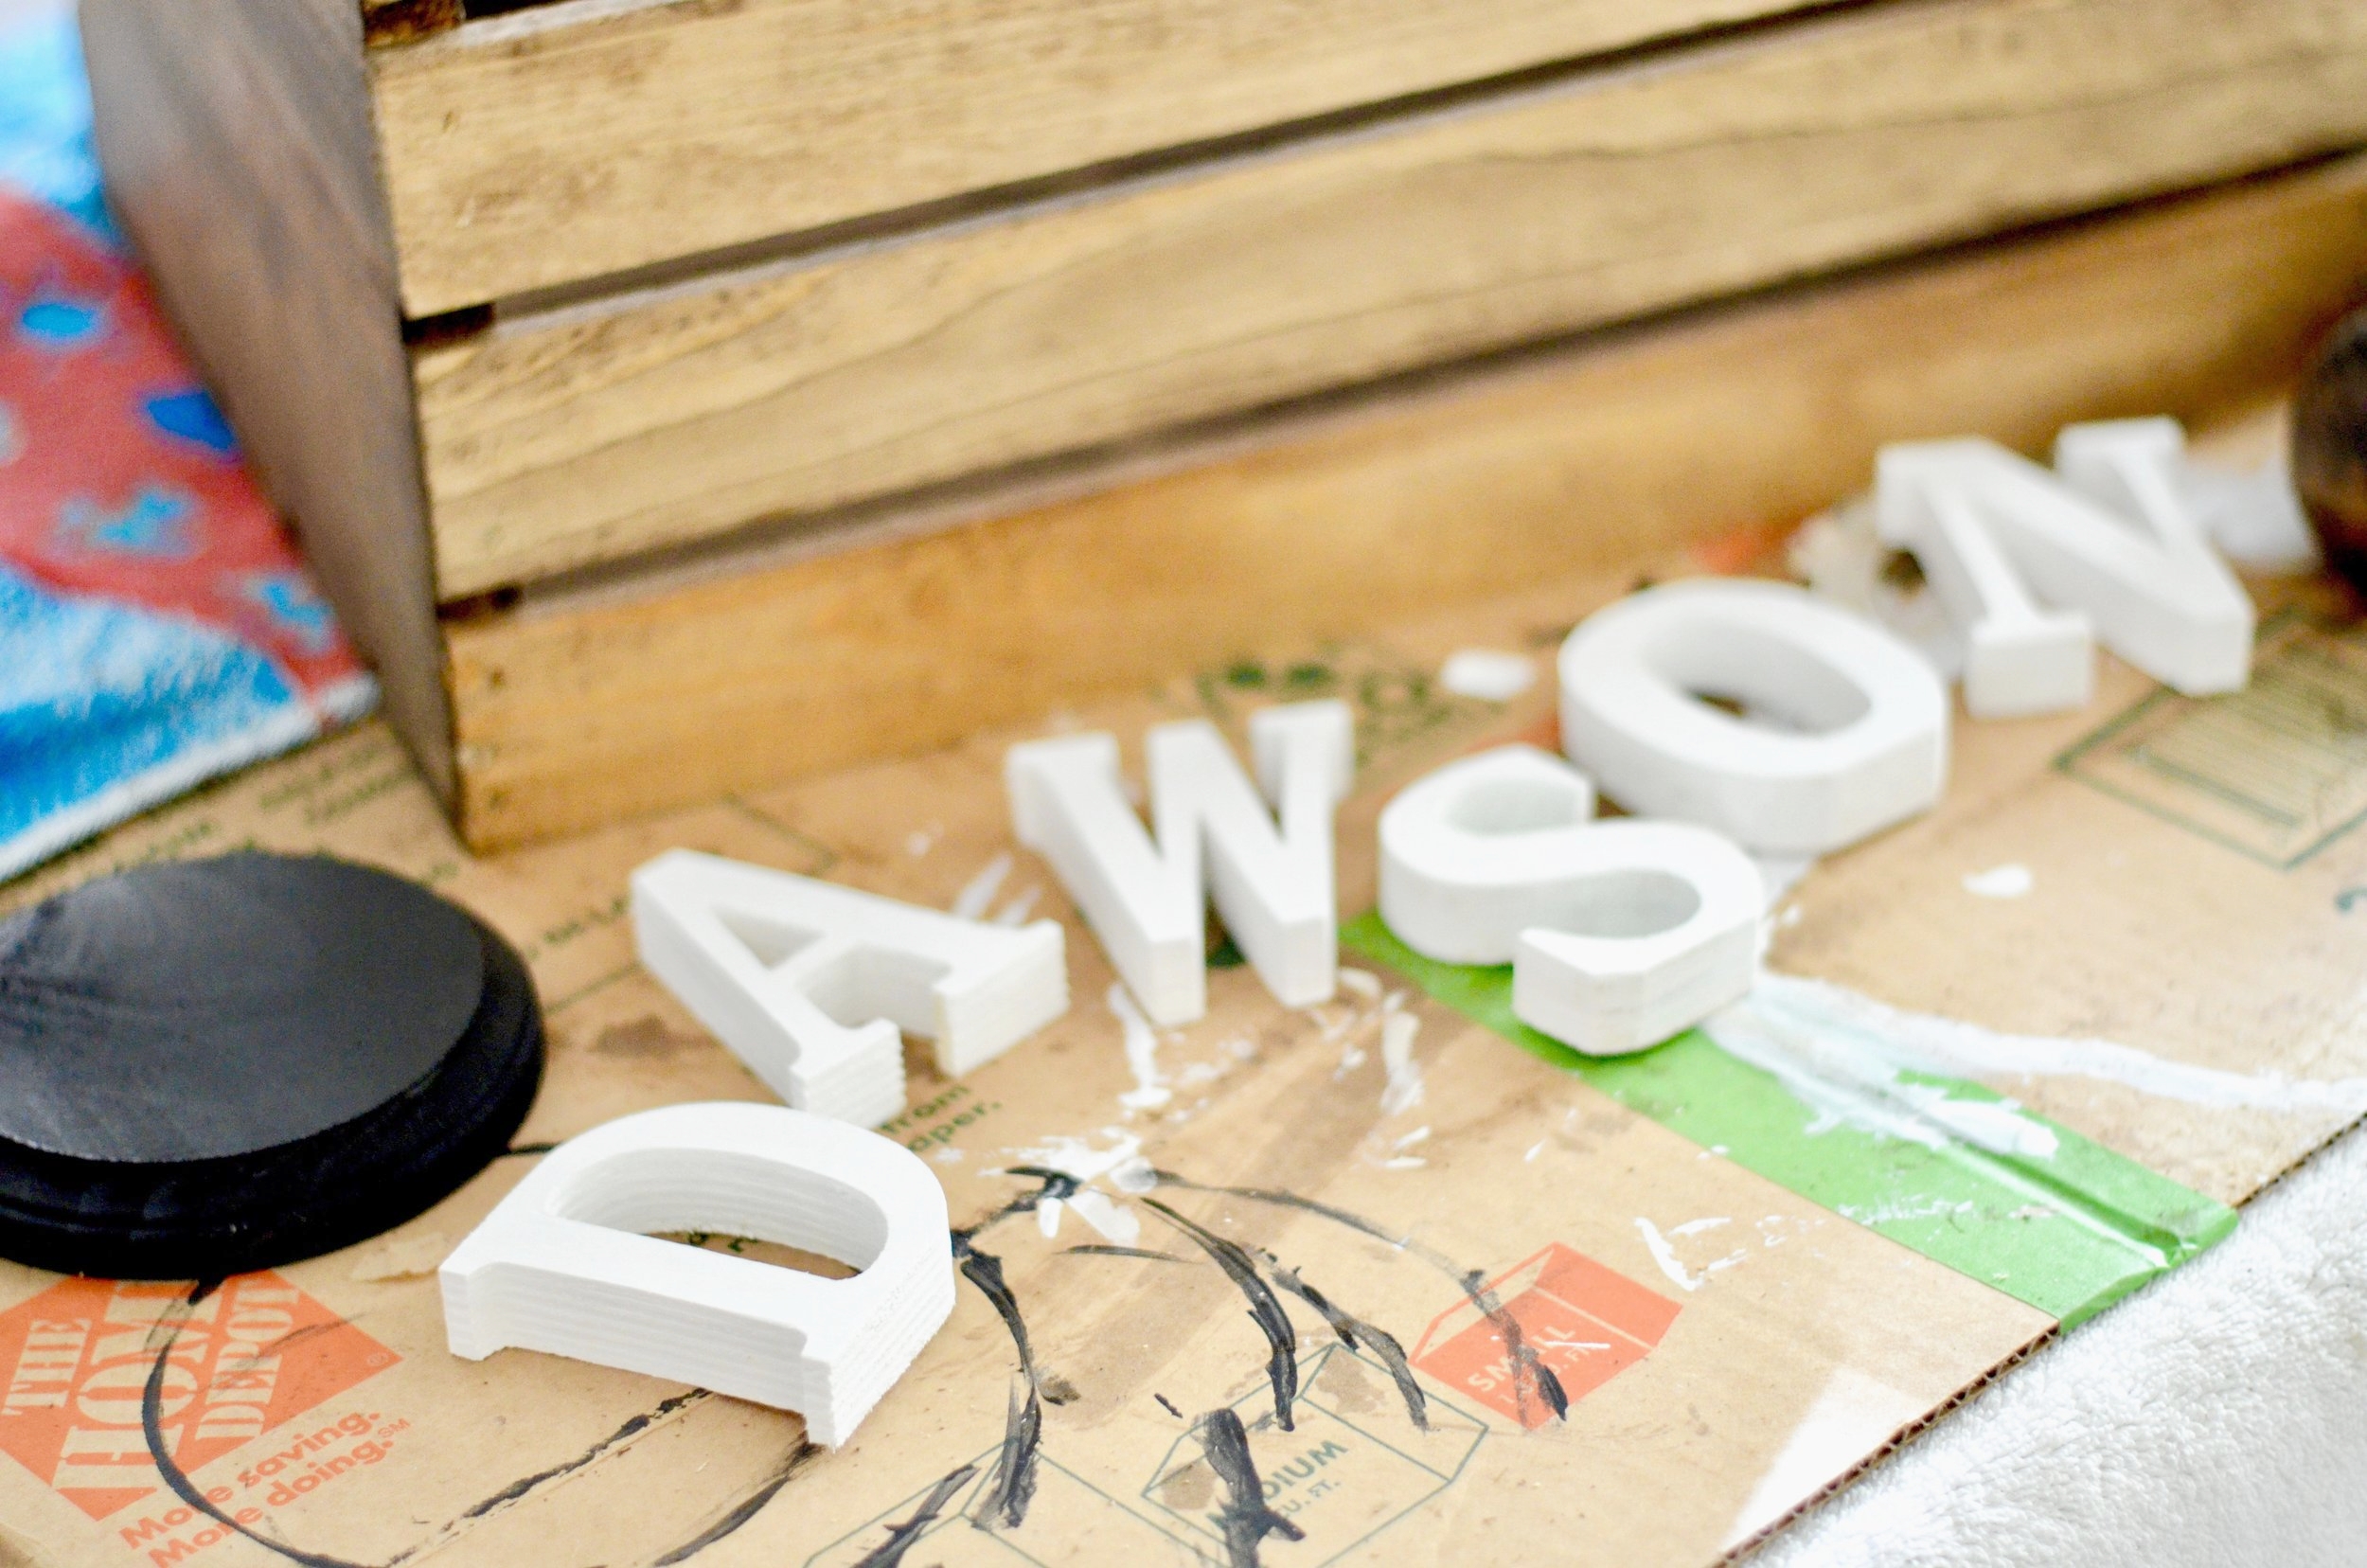
- 3" chunky unfinished wooden letters spelling out your pup's name
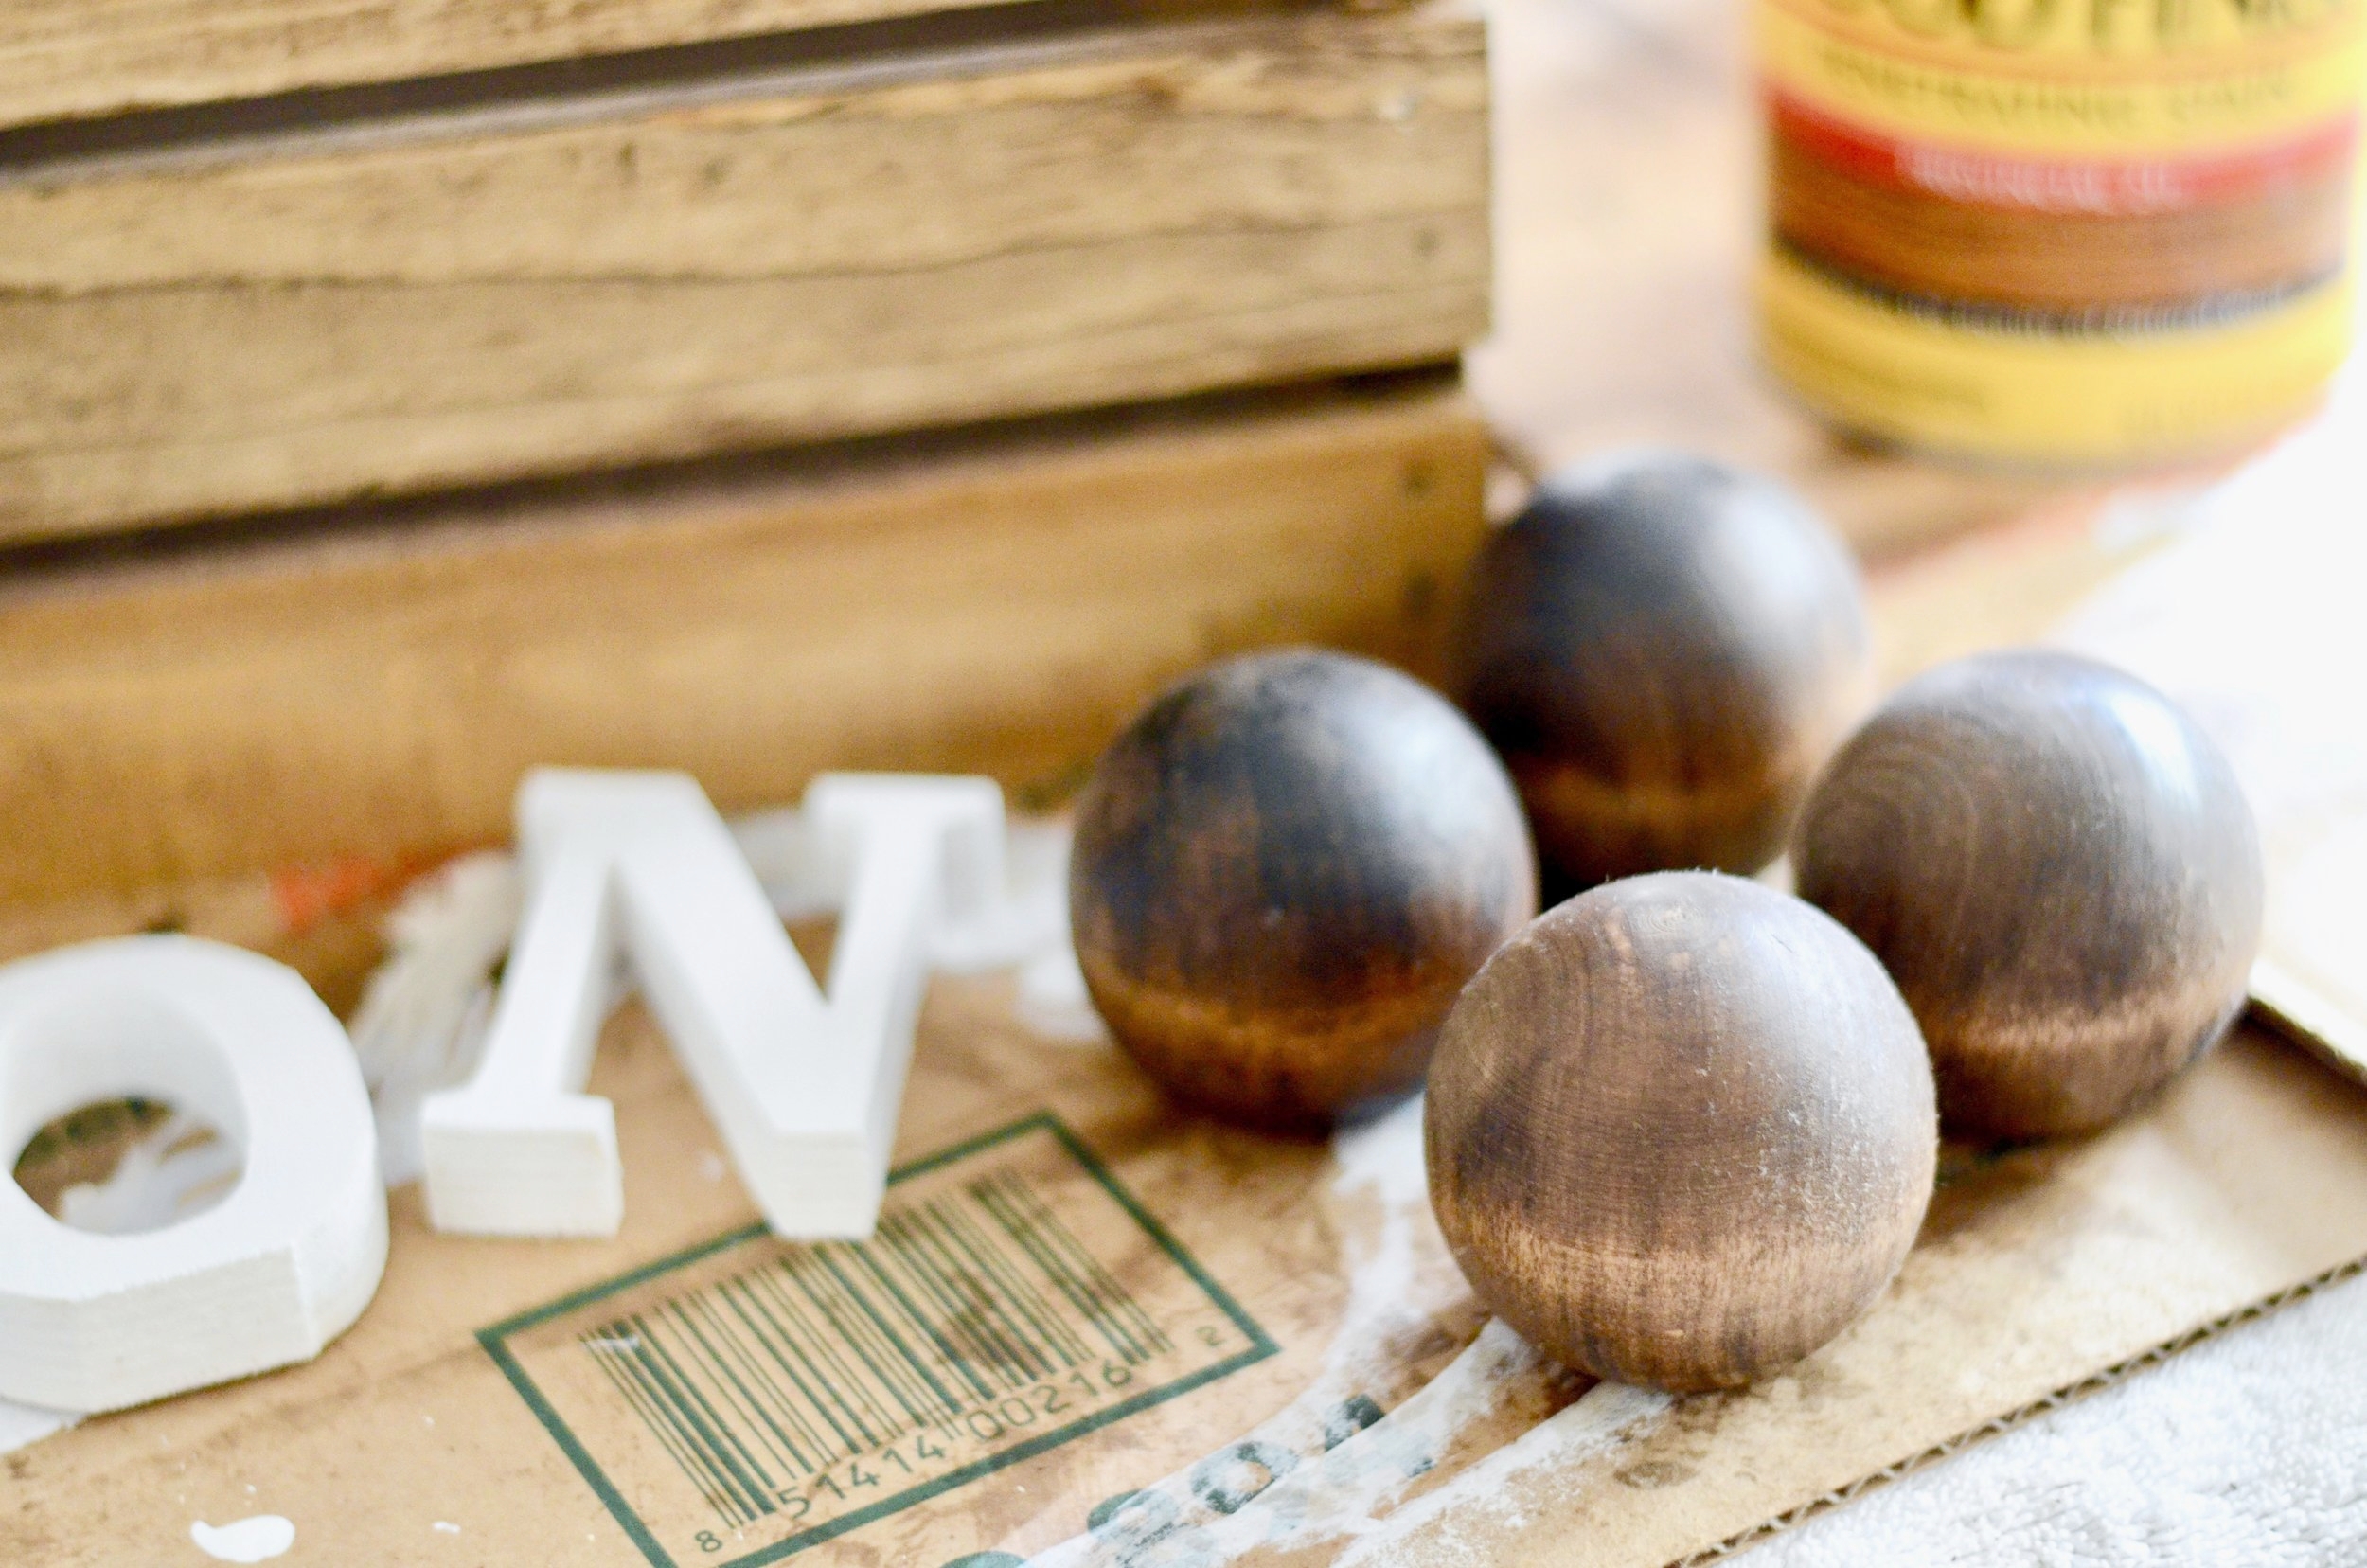
- 4 2.5" unfinished wooden doll heads (for the legs)
- 1 5" x 5" unfinished circular wooden plaque
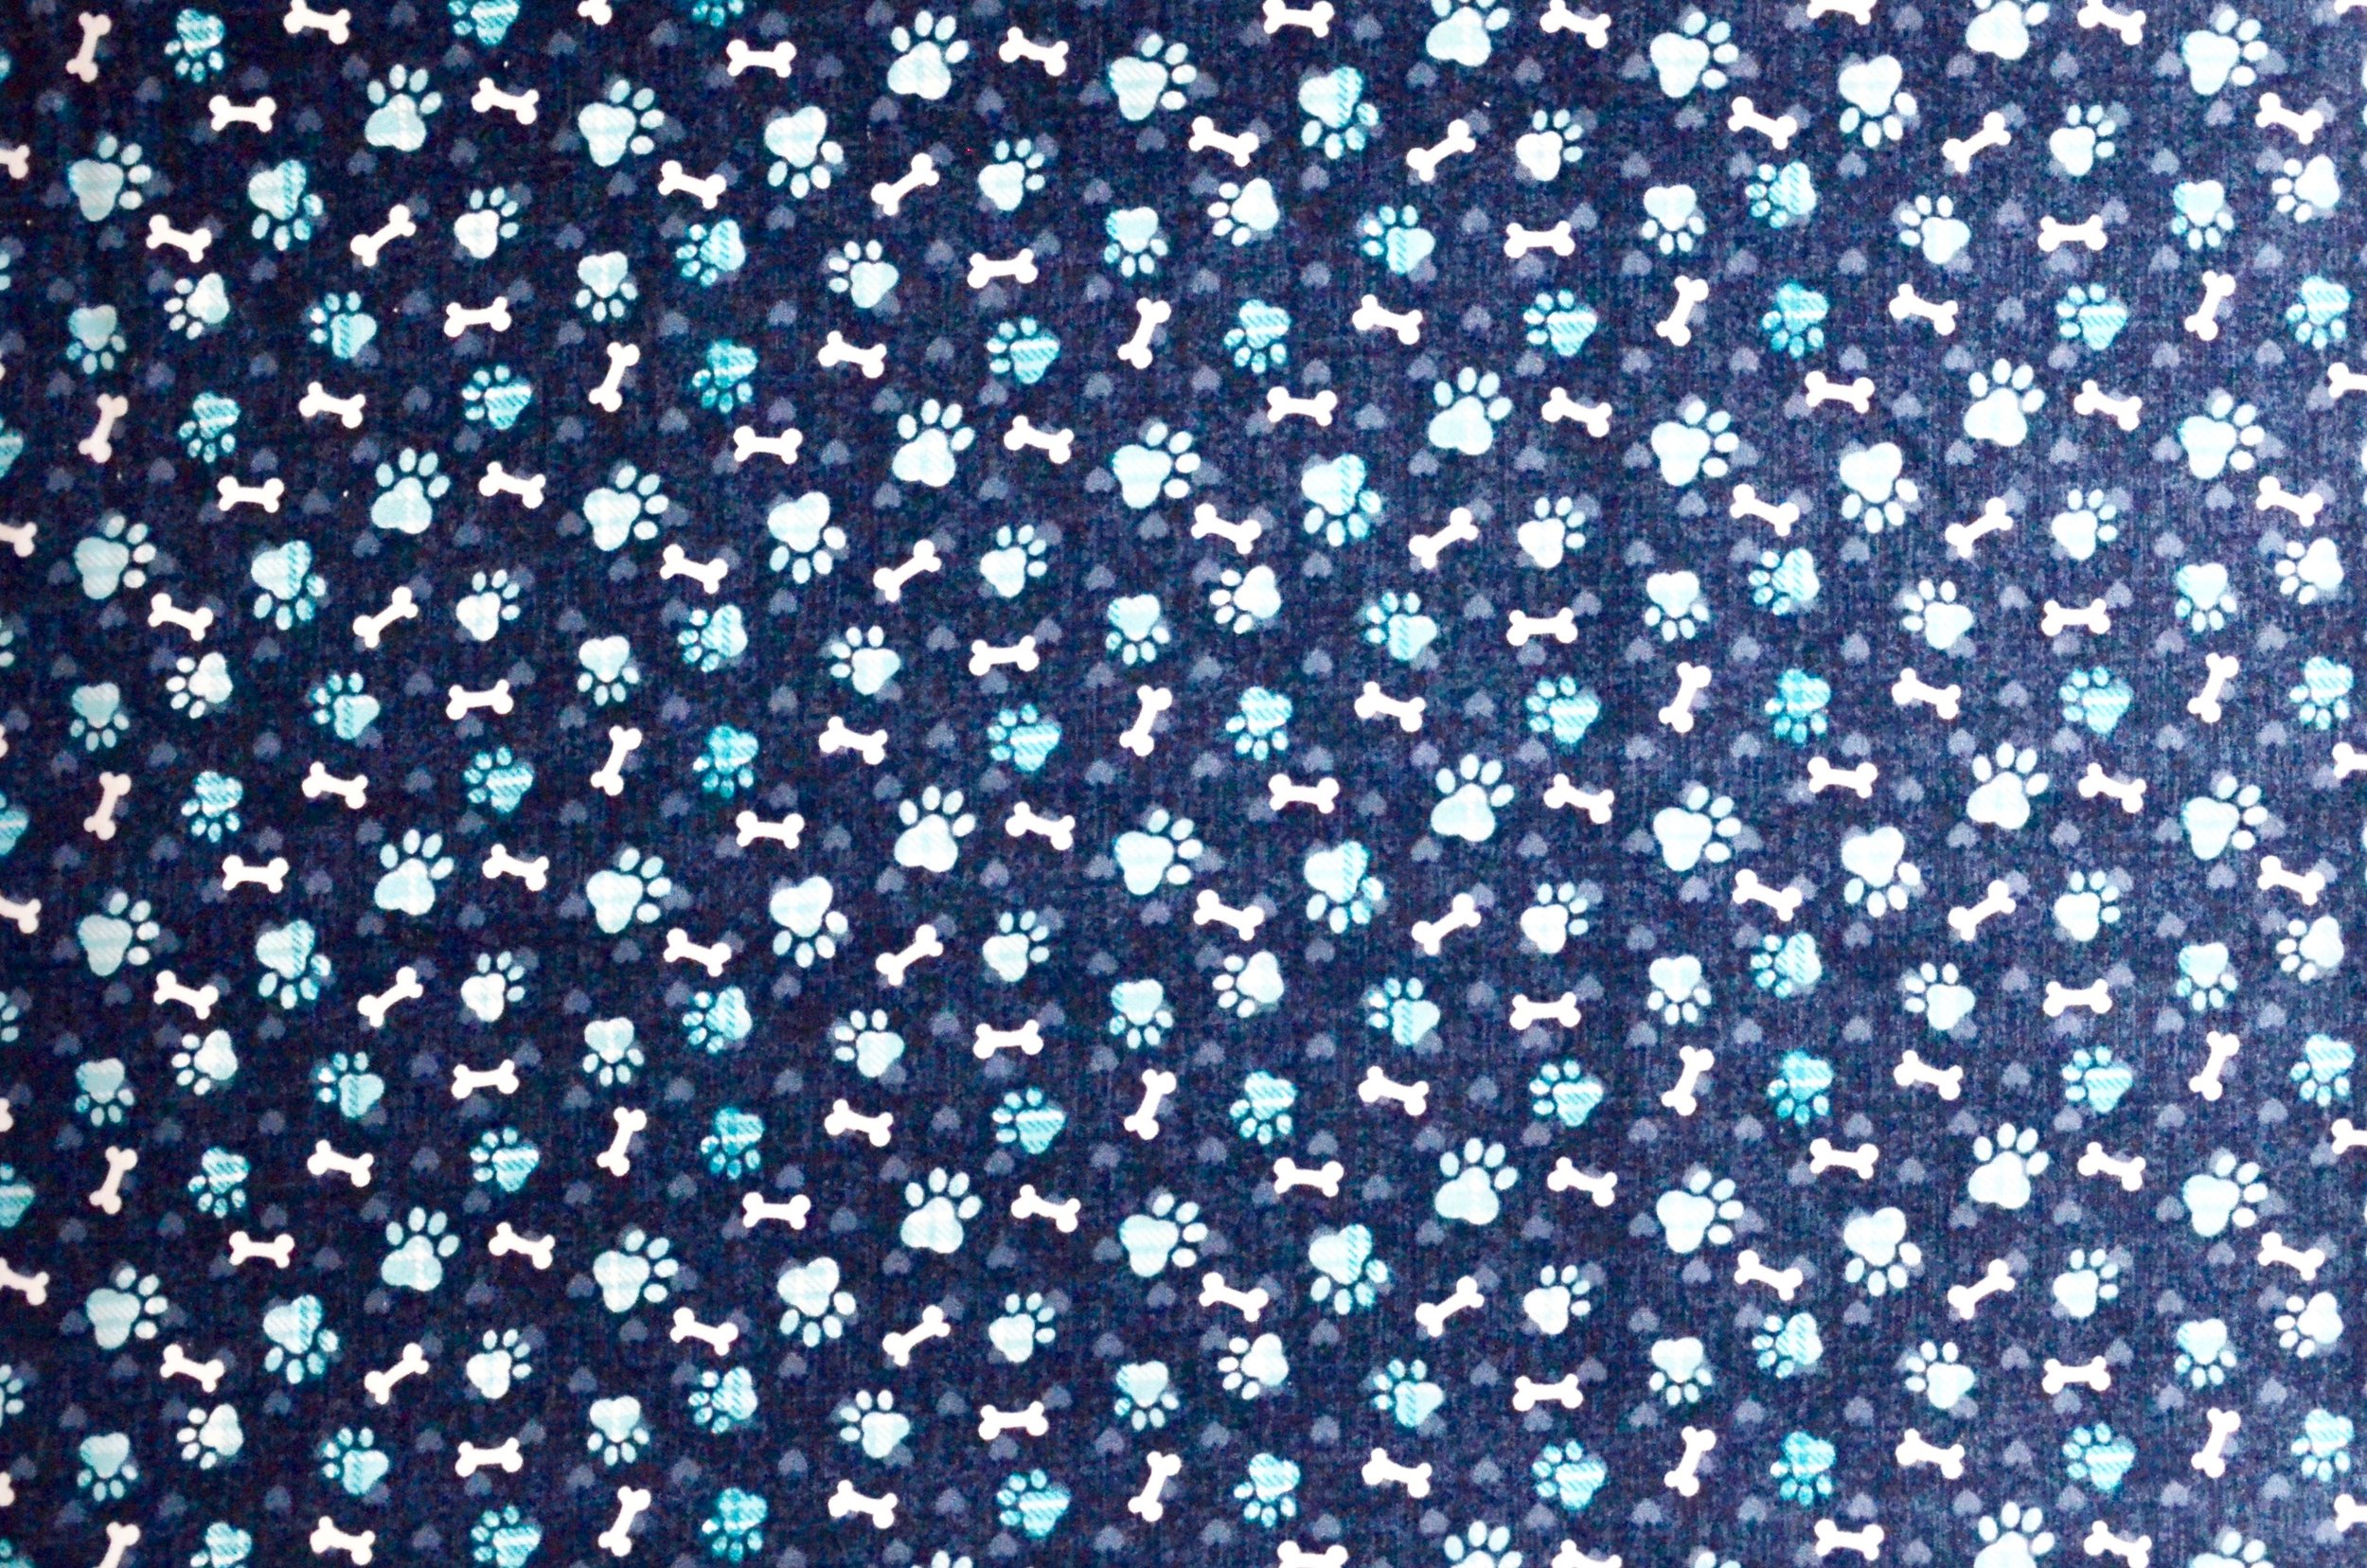
- 1.5 yards of fabric pattern of your choice
- 1 white, oil-based, fine-point sharpie marker (for wood)
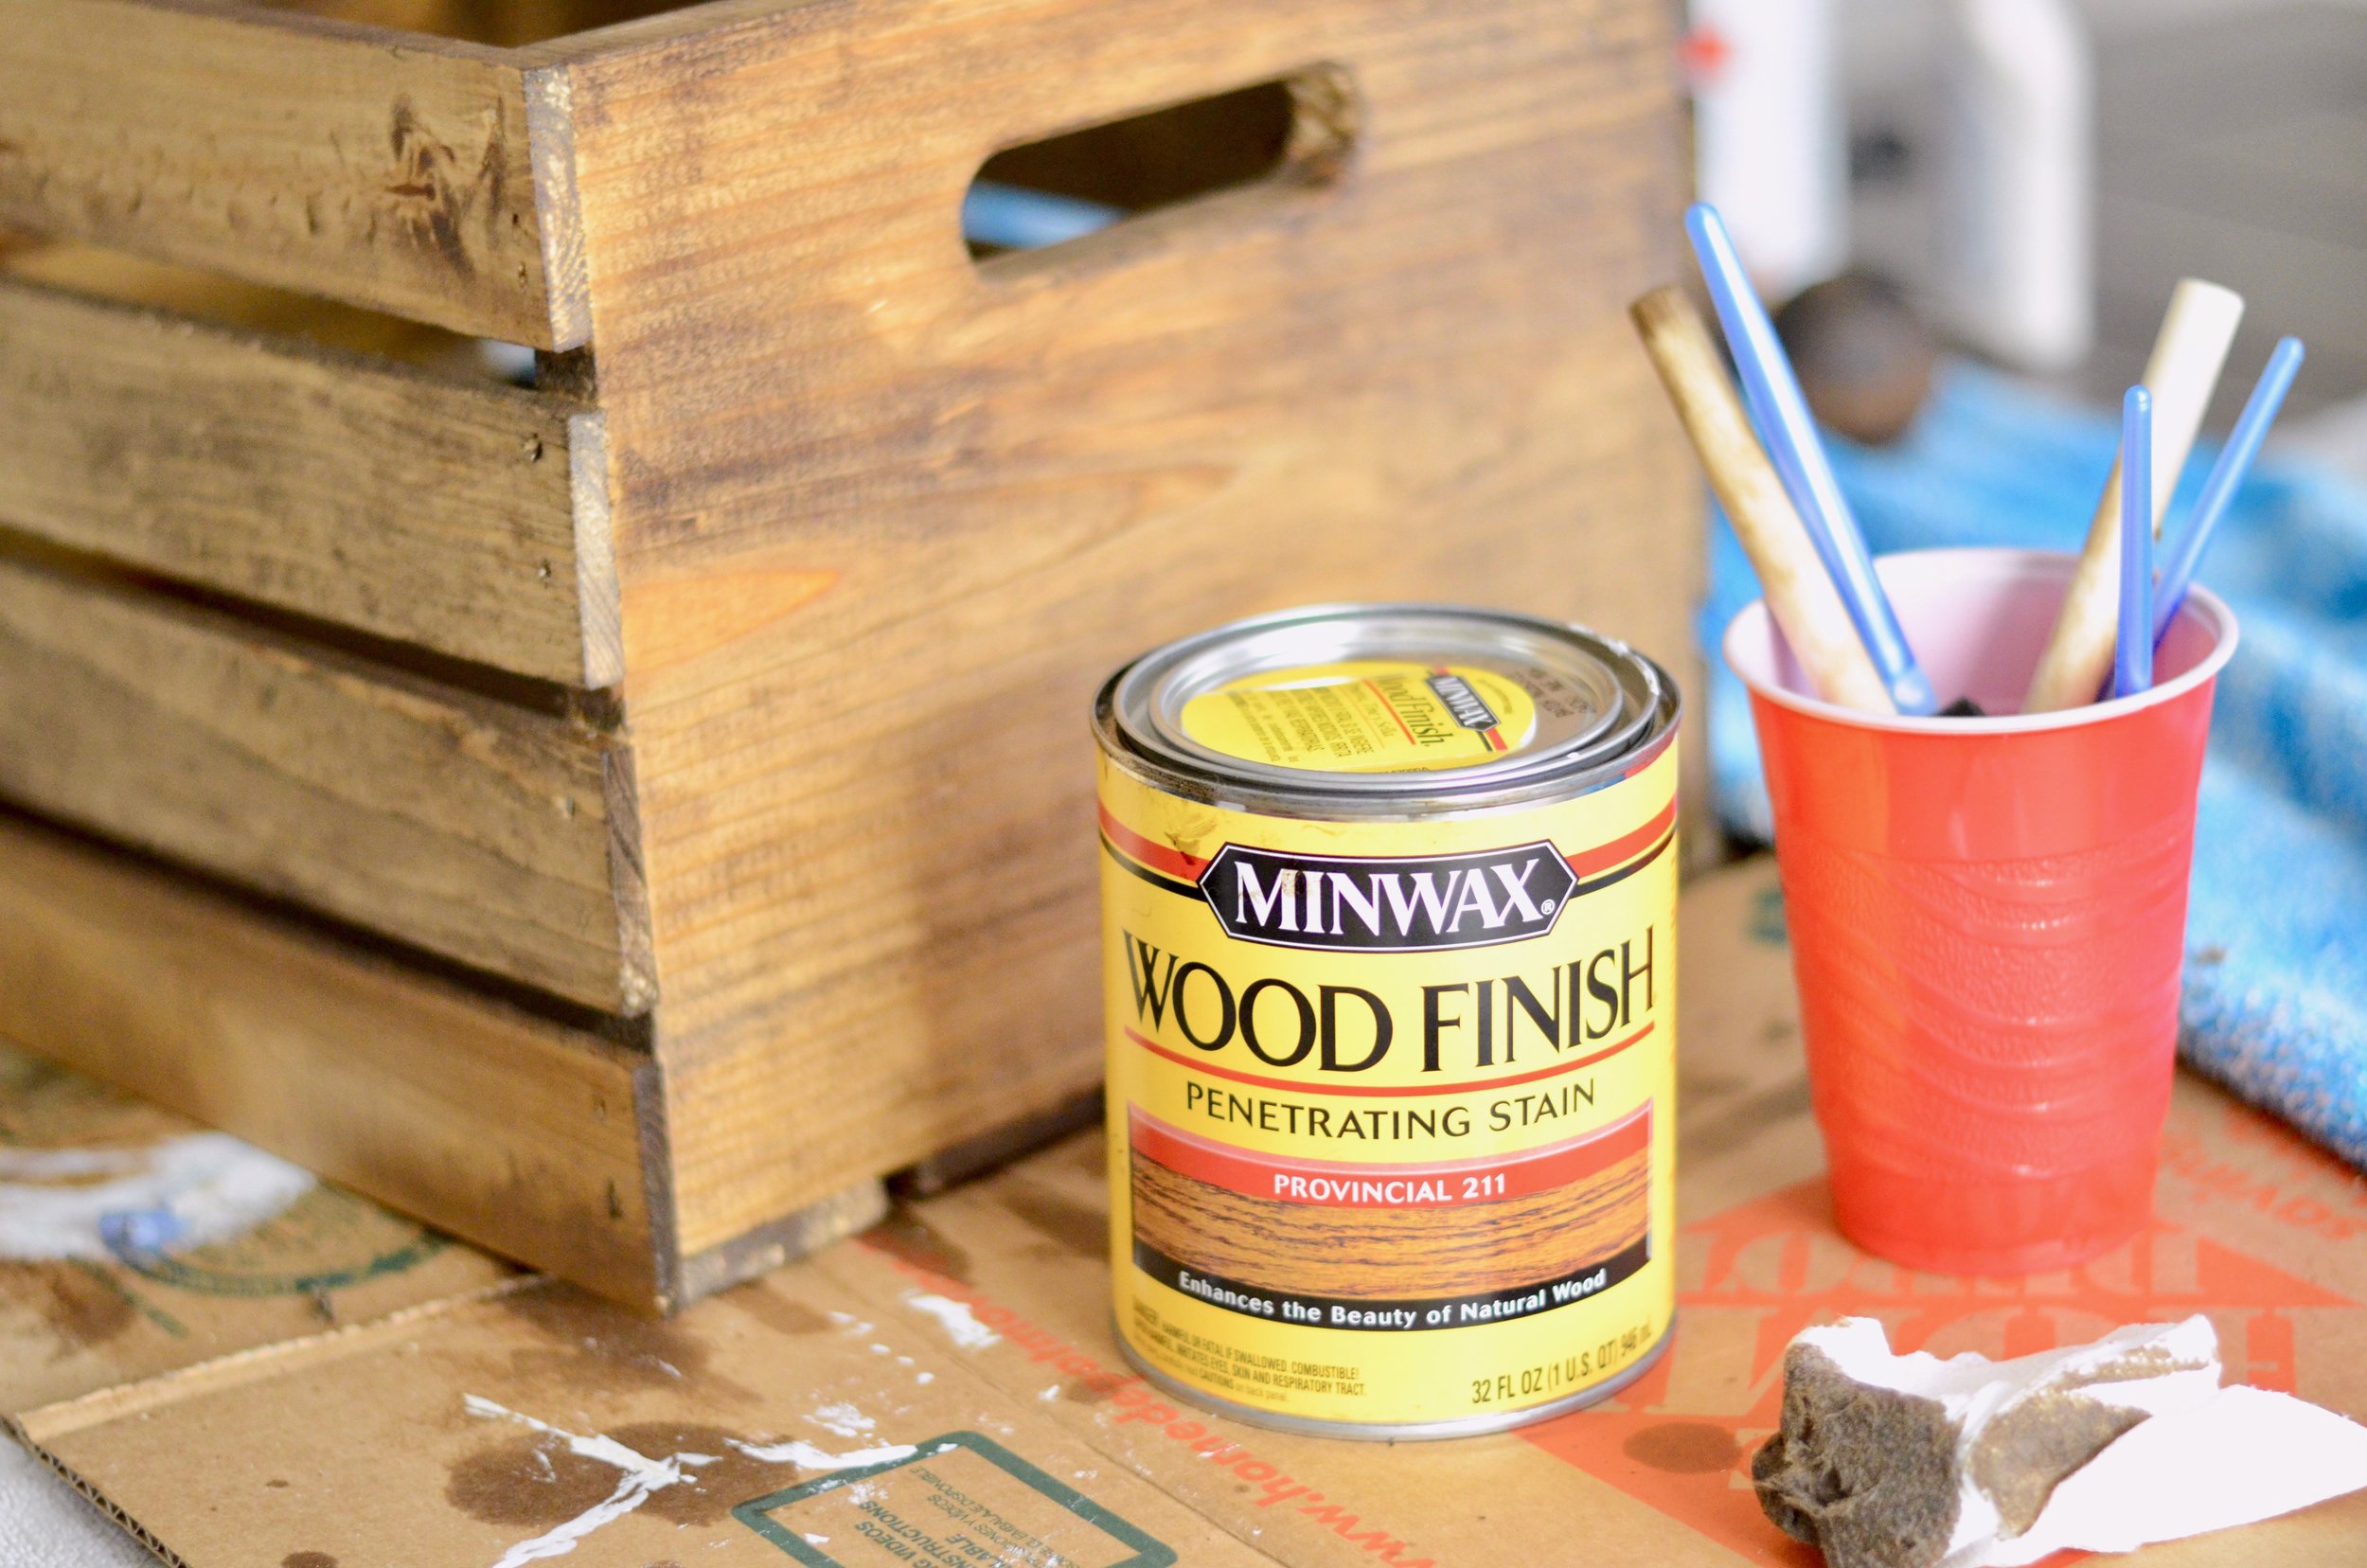
- Minwax Wood Finish Penetrating Stain (I used the shade 'Provincial 211')
- 1 set of paintbrushes (I used a 1 filbert brush (size 8) and 2 oval wash brushes (sizes 1/2″, 3/4″))
- Tarp, newspaper, or cardboard boxes for your work surface (any will work)
- 1 small bottle of black paint
- 1 small bottle of white paint
- Hot glue gun + refillable glue sticks
- Paper towels
- Paper plate
- An old rag
- A plastic cup
(I ended up not needing to use the Elmer's wood glue and just used a hot glue gun for everything; I also didn't use the sponge brushes because I planned on using them for the stain, but it made it come out wayyyyy too dark for my liking; I bought the wooden frame with scalloped edges because I wanted to incorporate a picture of him on it somehow, but I didn't want it to look overcrowded so I didn't use that either haha)
Directions:
Begin by preparing your work surface with a tarp, newspaper, or cardboard boxes. My little brother and I crafted this project on my family's dining room table, so I covered it with two layers of old towels and one layer of flat cardboard boxes just to be safe.
Squirt a small amount of white paint and a small amount of black paint on two separate sides of a paper plate, making sure that they do not touch/mix.
Paint the letters white in long, even strokes, making sure to cover the entire letters equally. We applied three coats to each letter.
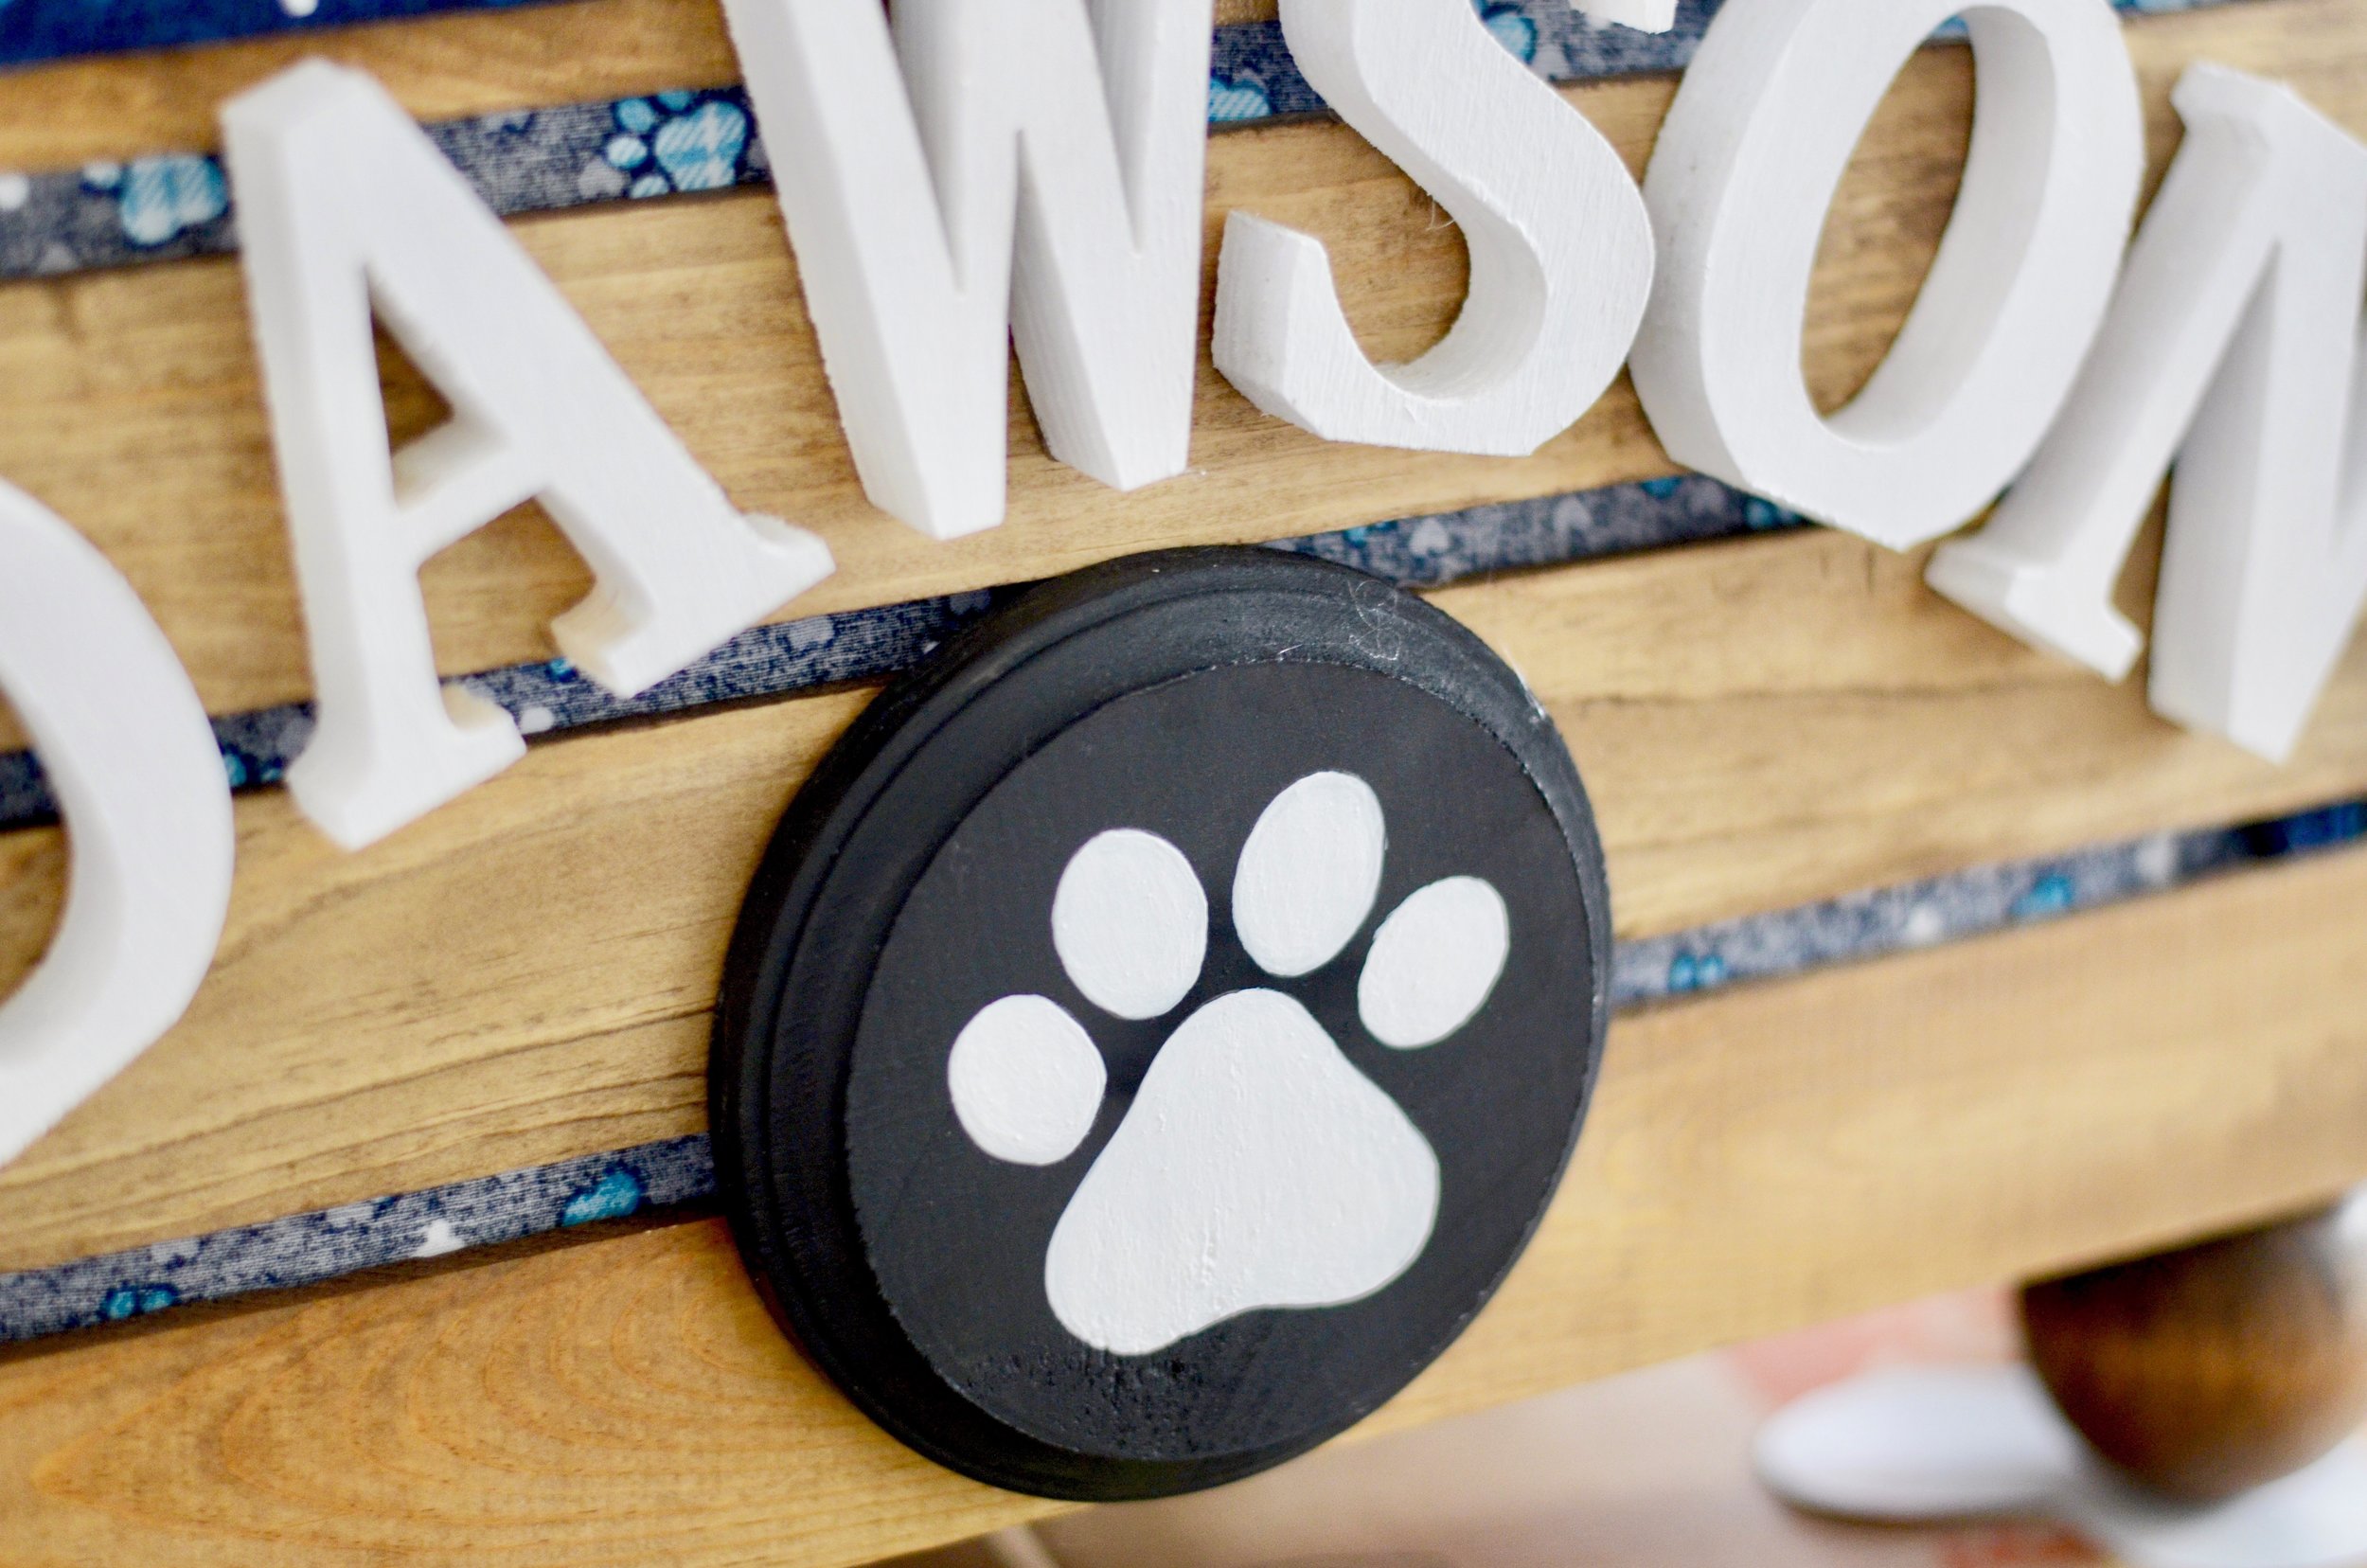
Paint the round plaque black, again in long, even strokes, making sure to cover the entire surface equally. We applied three coats to each plaque. When you are done with a particular brush, set it aside in the plastic cup and add water inside to keep the paint from drying in the bristles.
Begin staining the wooden doll heads, which will be the legs of the toy box. A little bit goes a long way with stain and the more you use, the darker the end result will be. So, with a VERY SMALL DAB of stain on your rag, coat the doll heads in a layer of stain and re-wet the rag as needed. Be sure to cover the entire surface evenly and reapply in any bare spots. Use a paper towel to wipe off any excess stain that has not absorbed into the wood. We only applied one layer to each doll head.
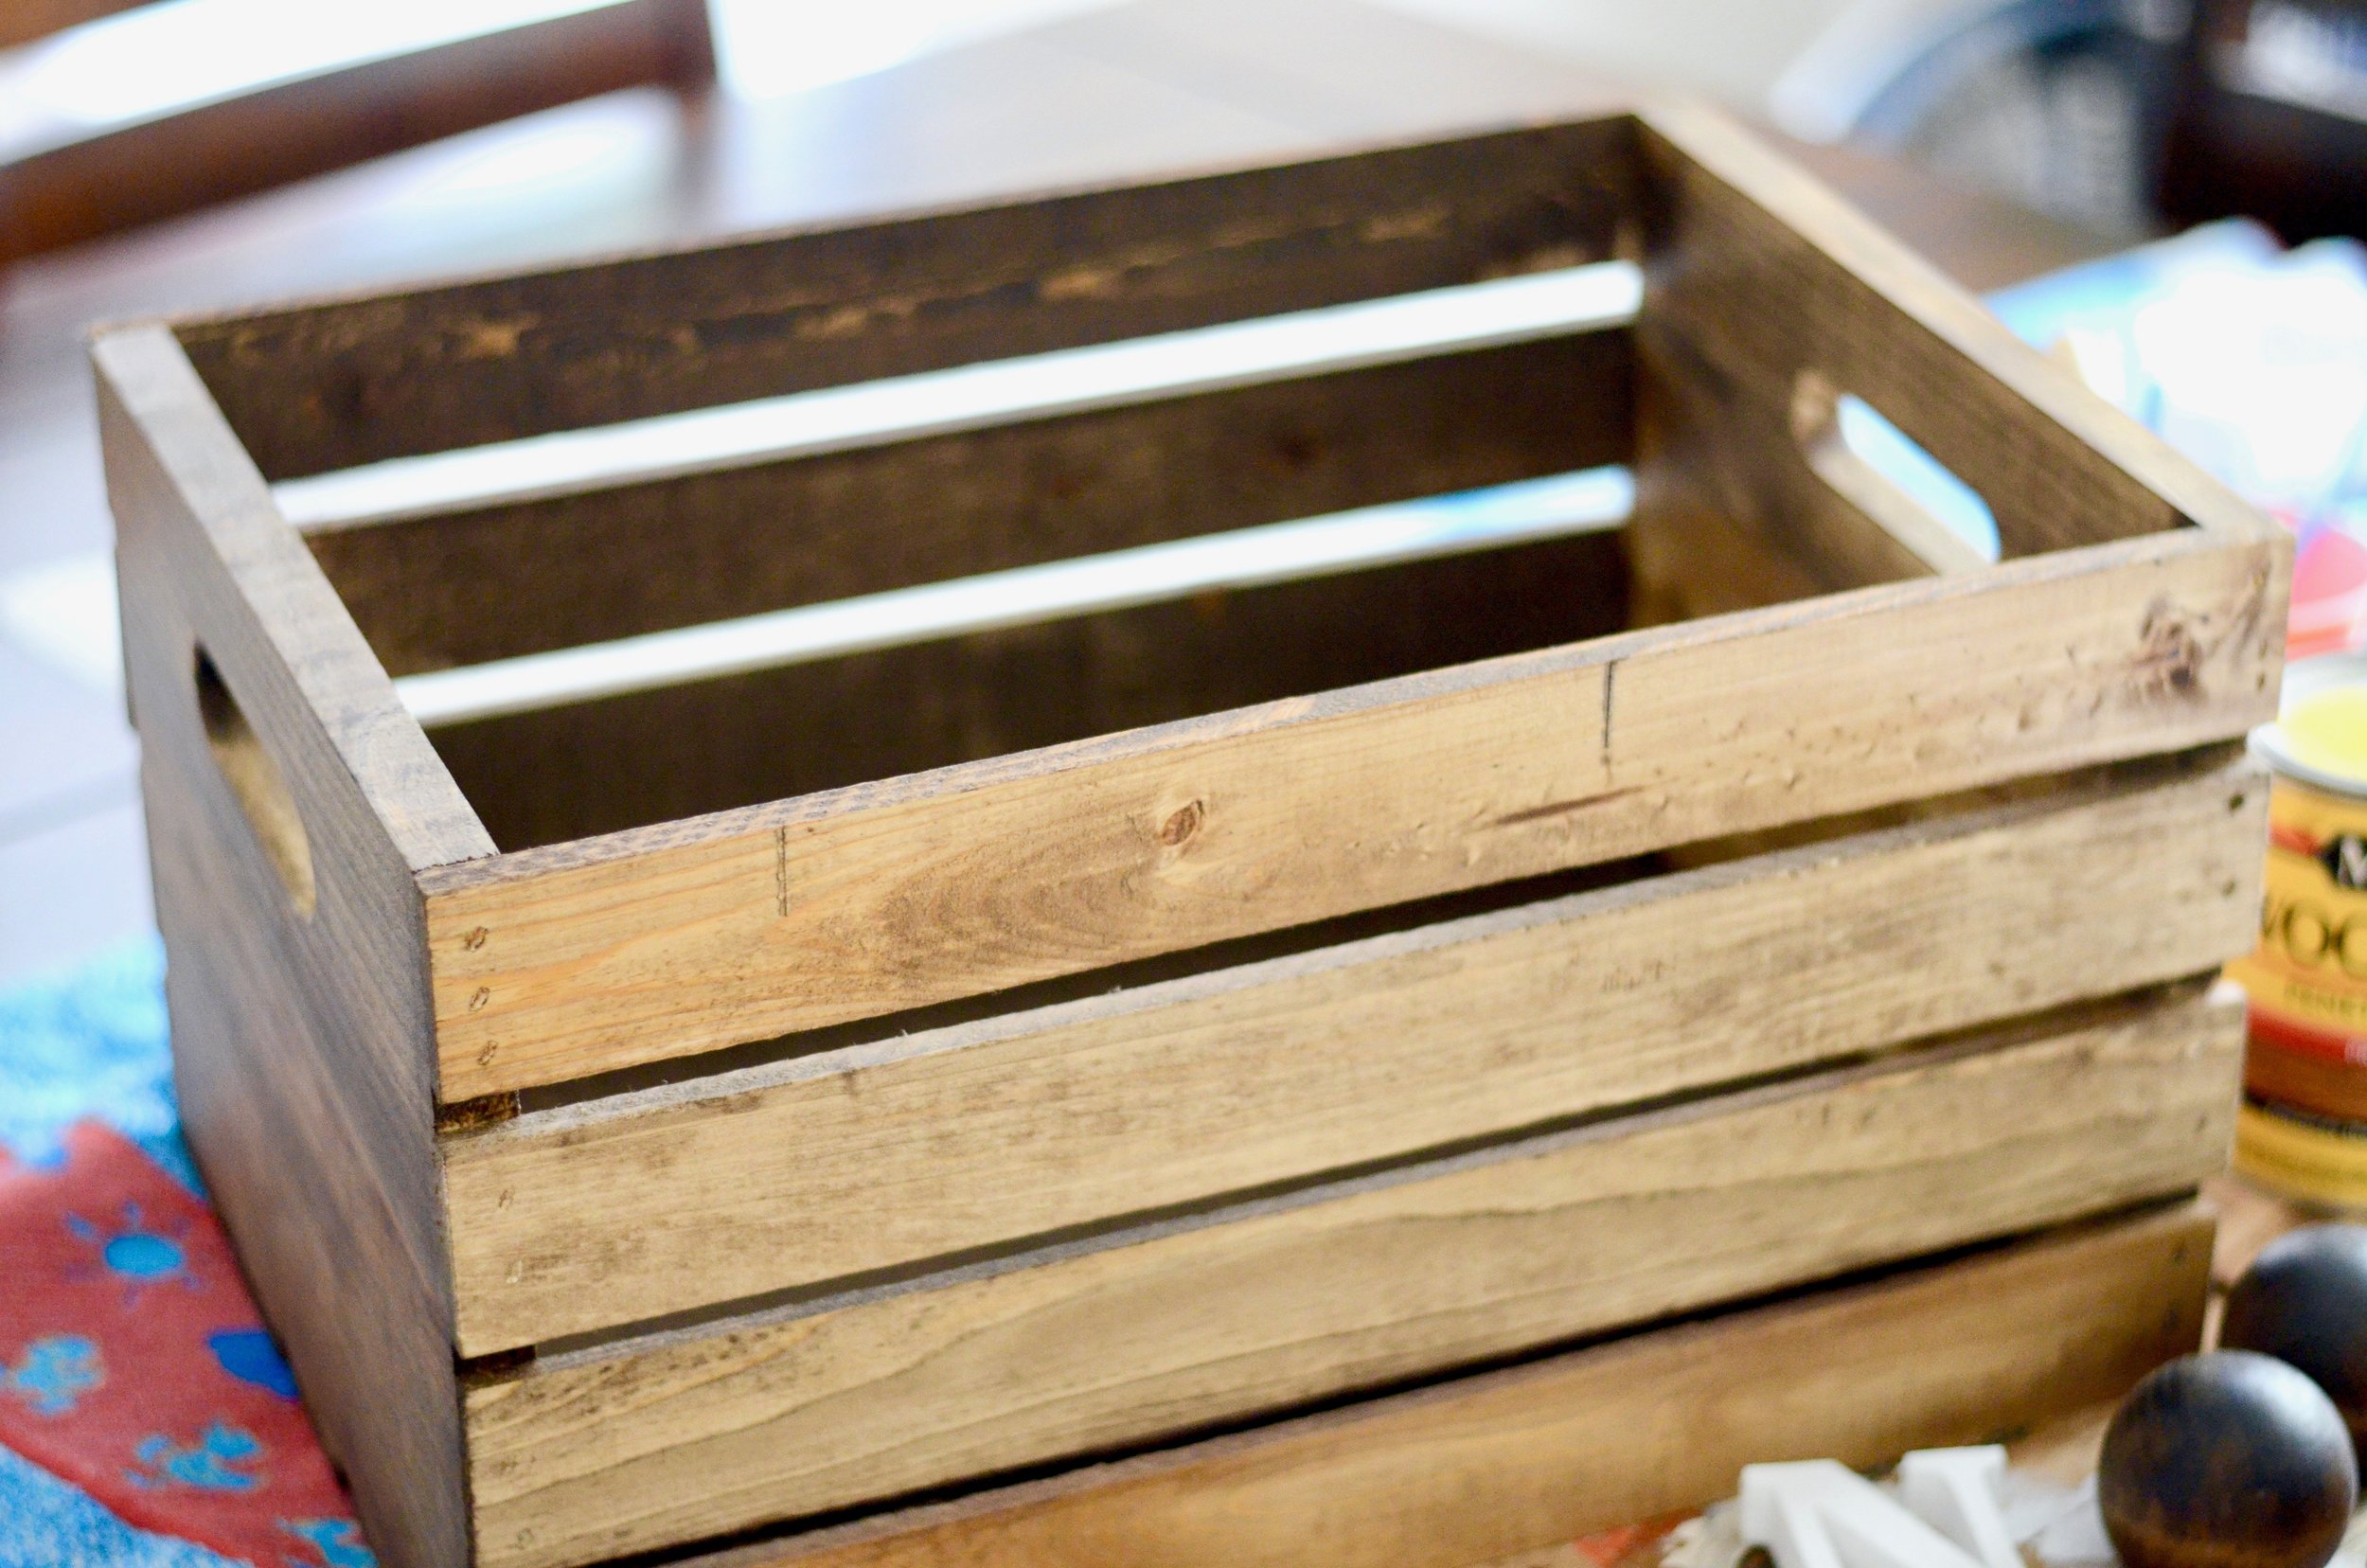
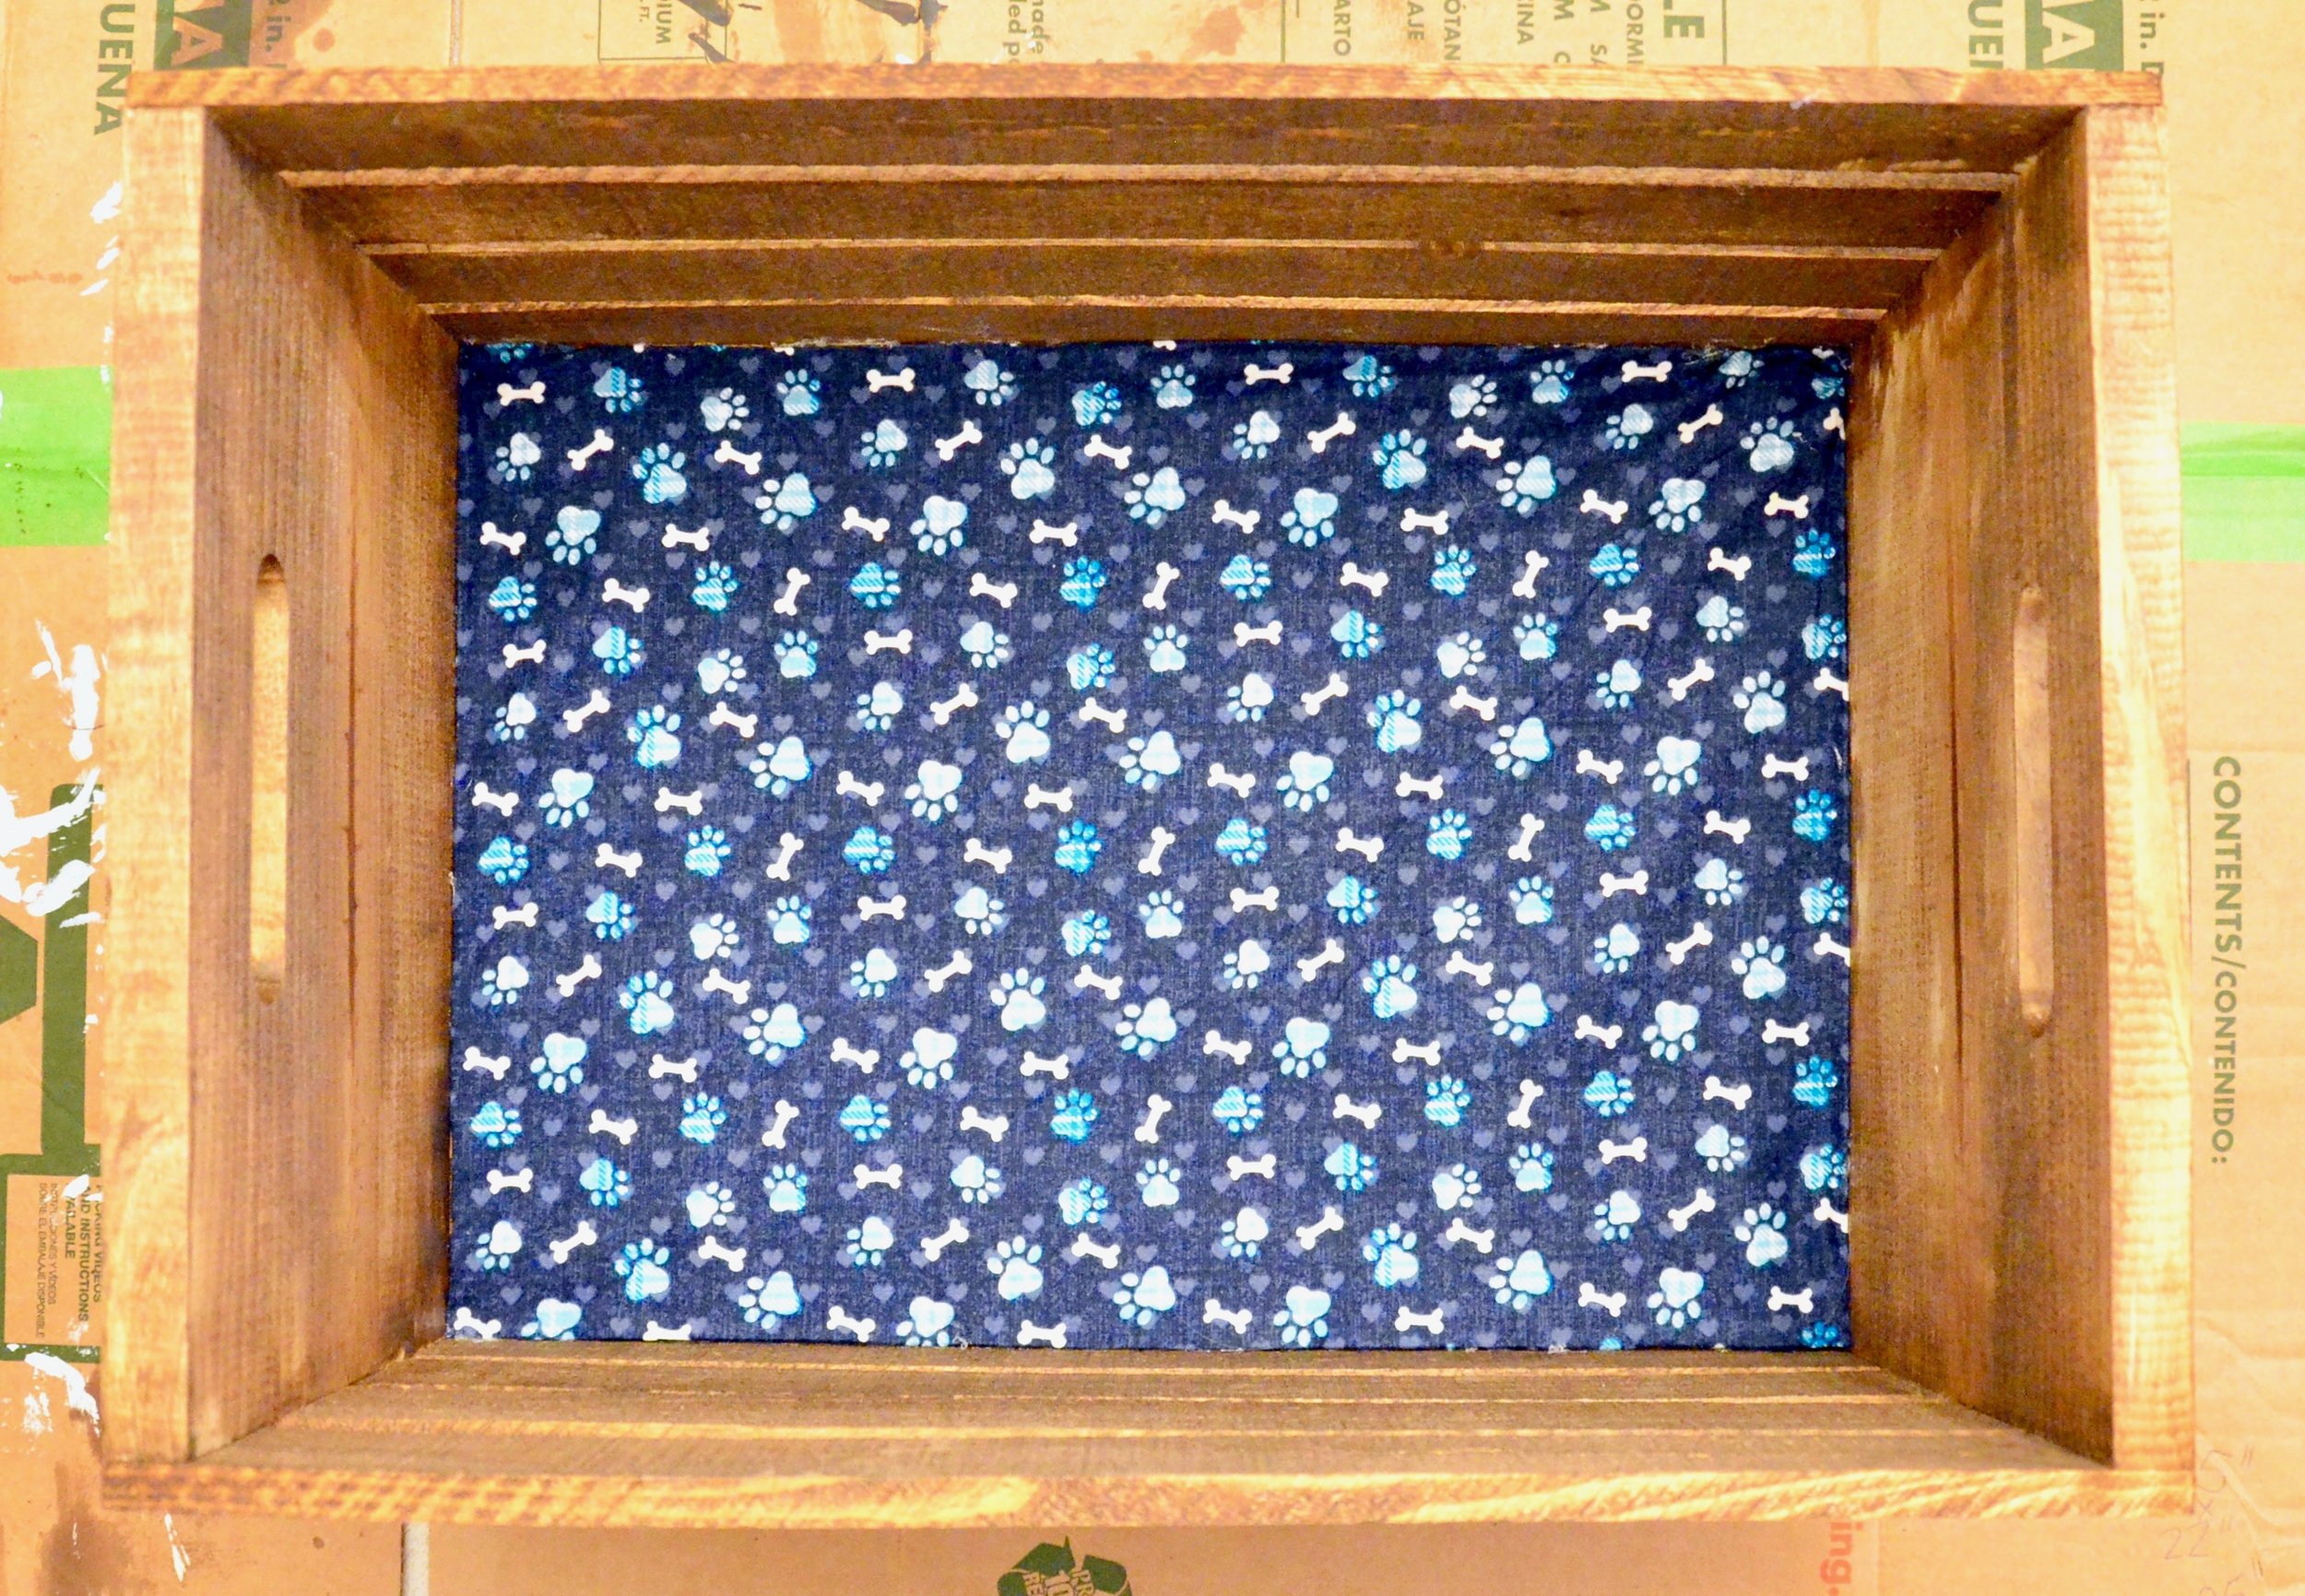
Next, you can stain the crate. Again, only using a small amount of stain on your rag, cover the entire surface of the crate in one even layer of stain using horizontal wiping motions. We only applied one layer to the crate. Once you have stained the entire crate, give it at least 30 minutes to fully dry. The color will lighten up just a bit as the wood completely absorbs the stain.
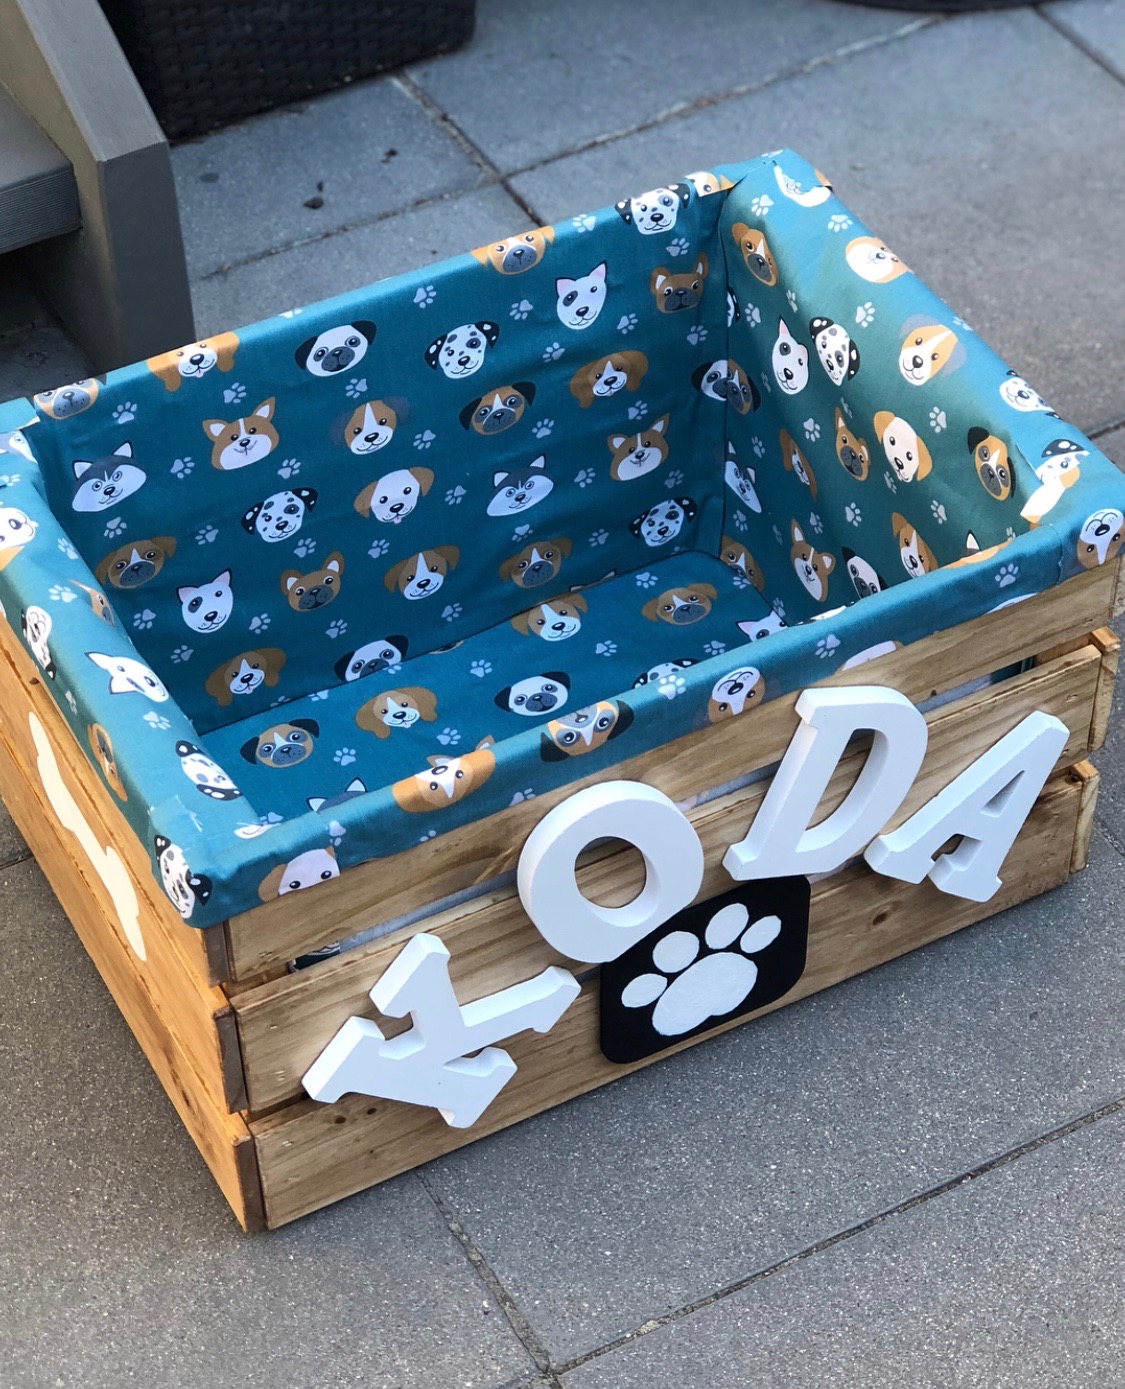
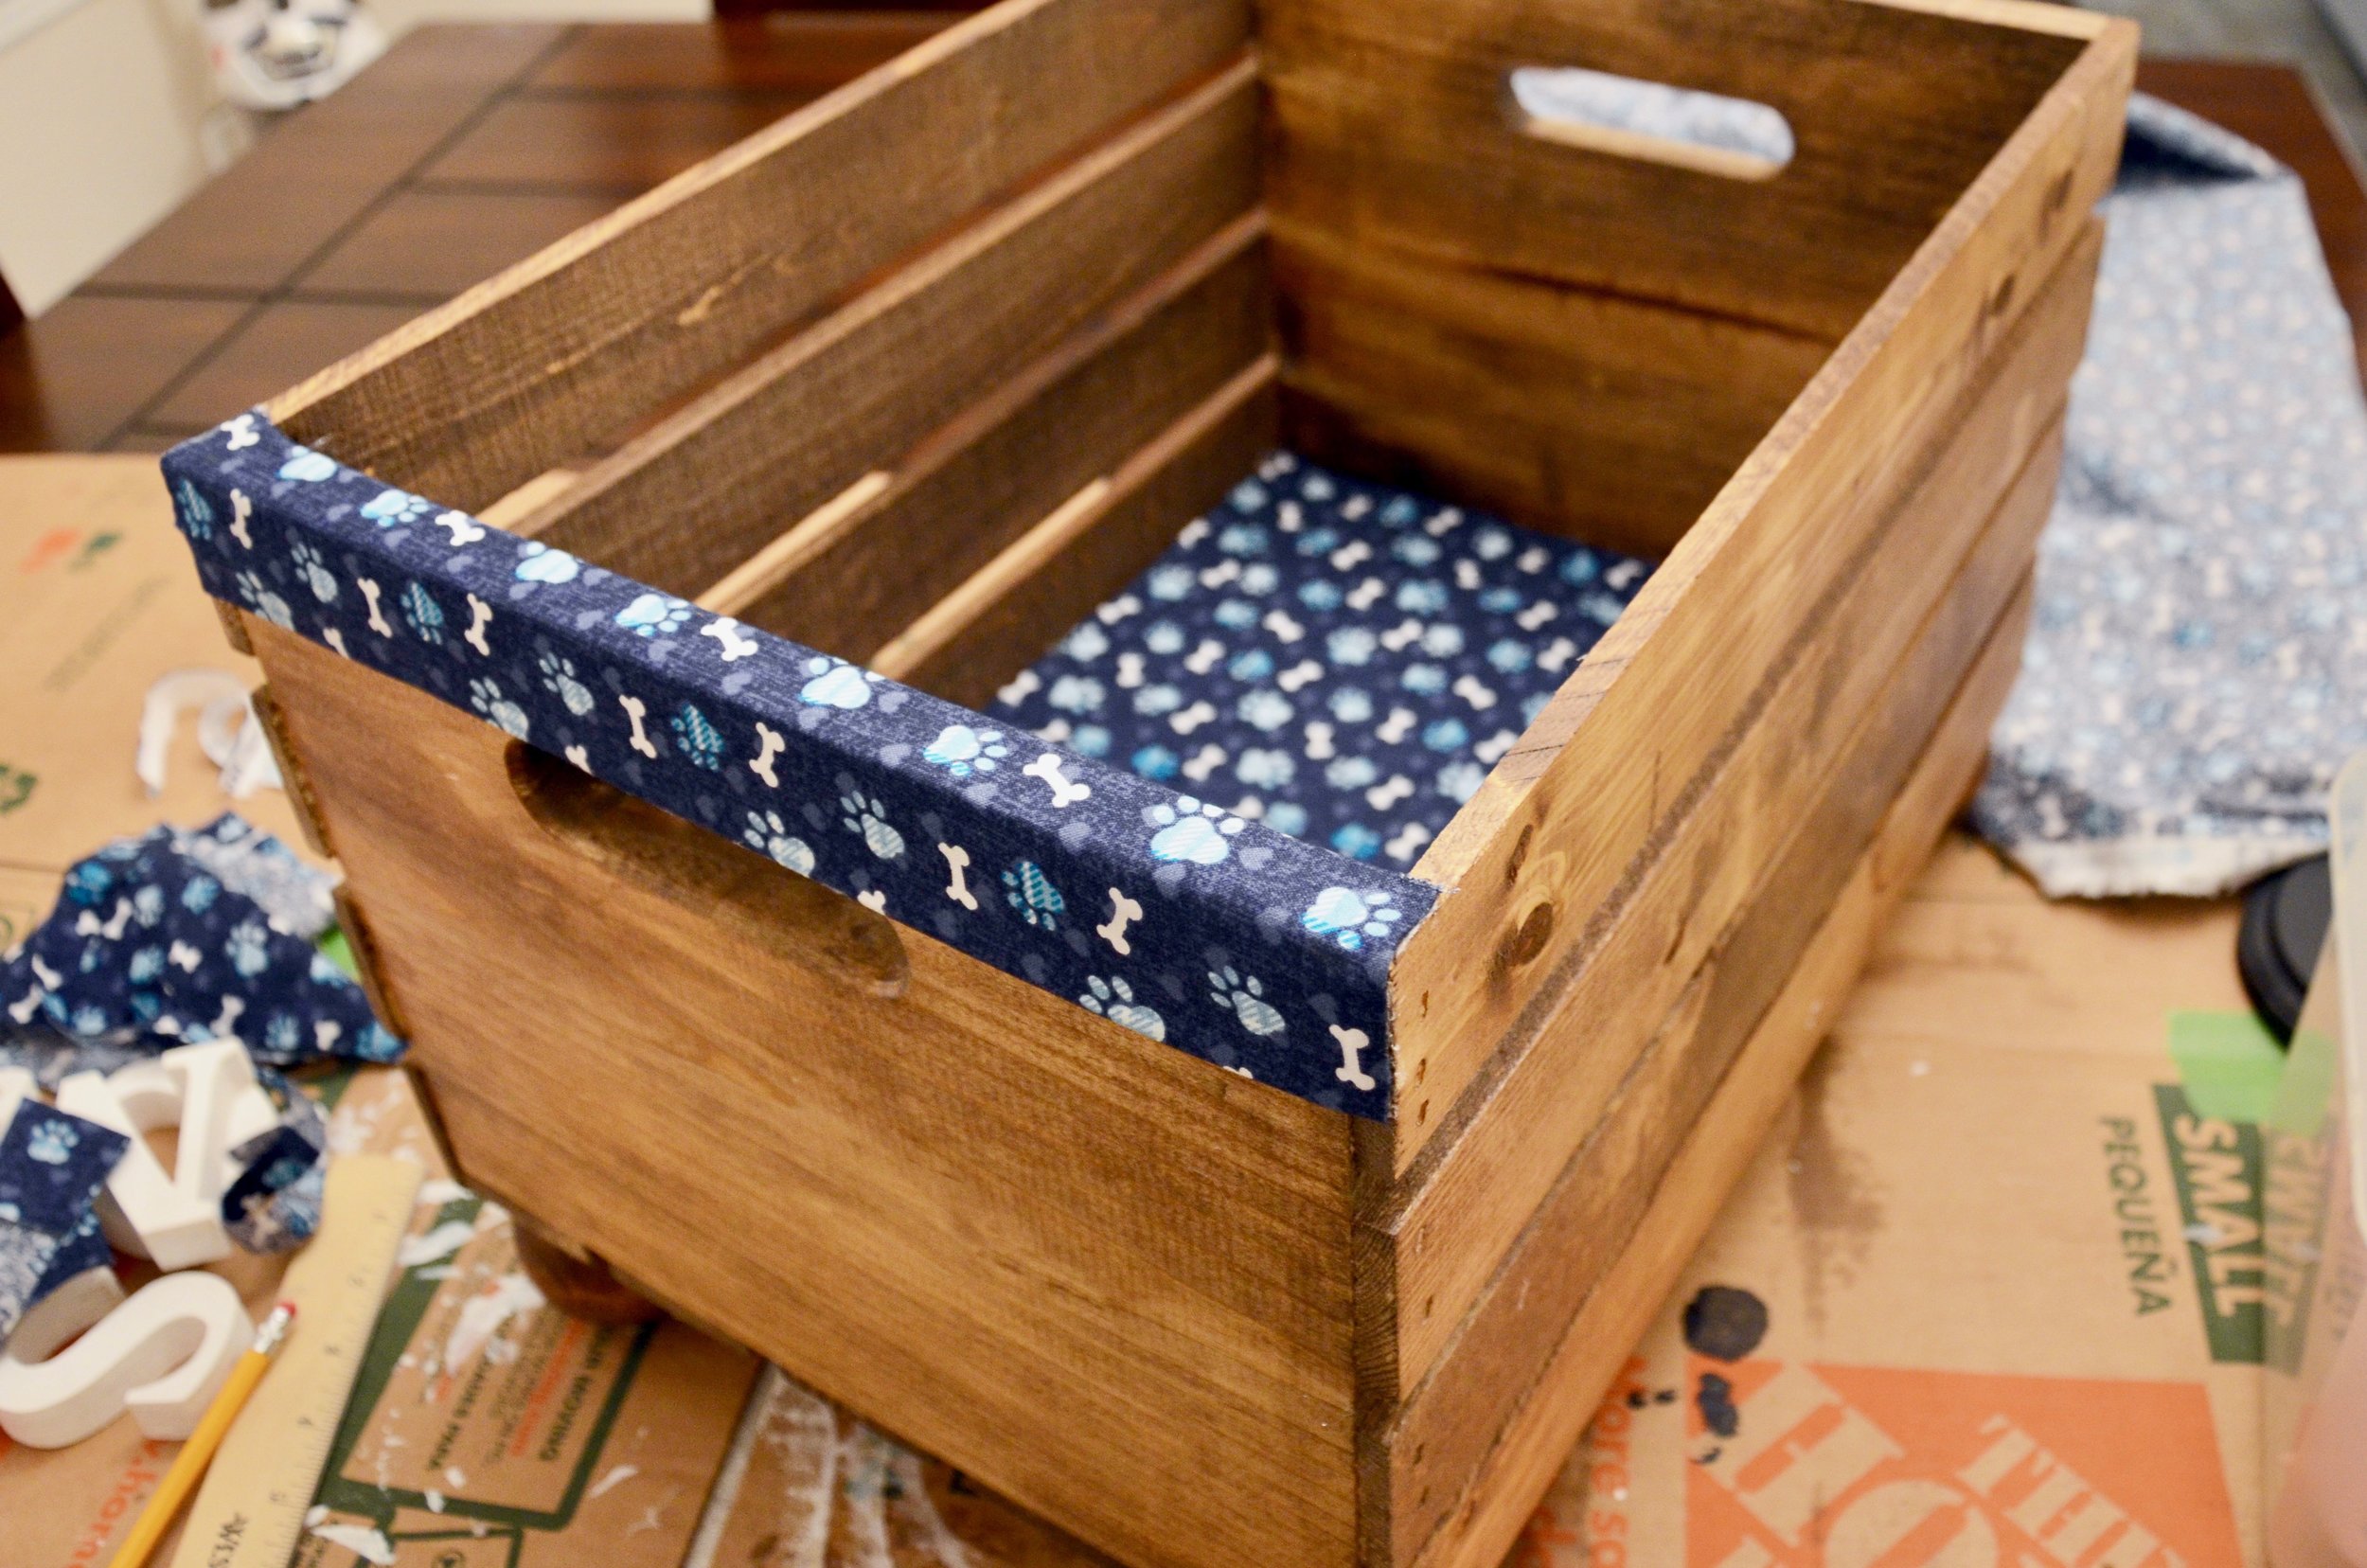
Once the crate has completely dried, flip it over and glue one doll head to each corner of the crate with a hot glue gun. Give it a minute to dry, then flip it back over and begin working on the fabric lining.
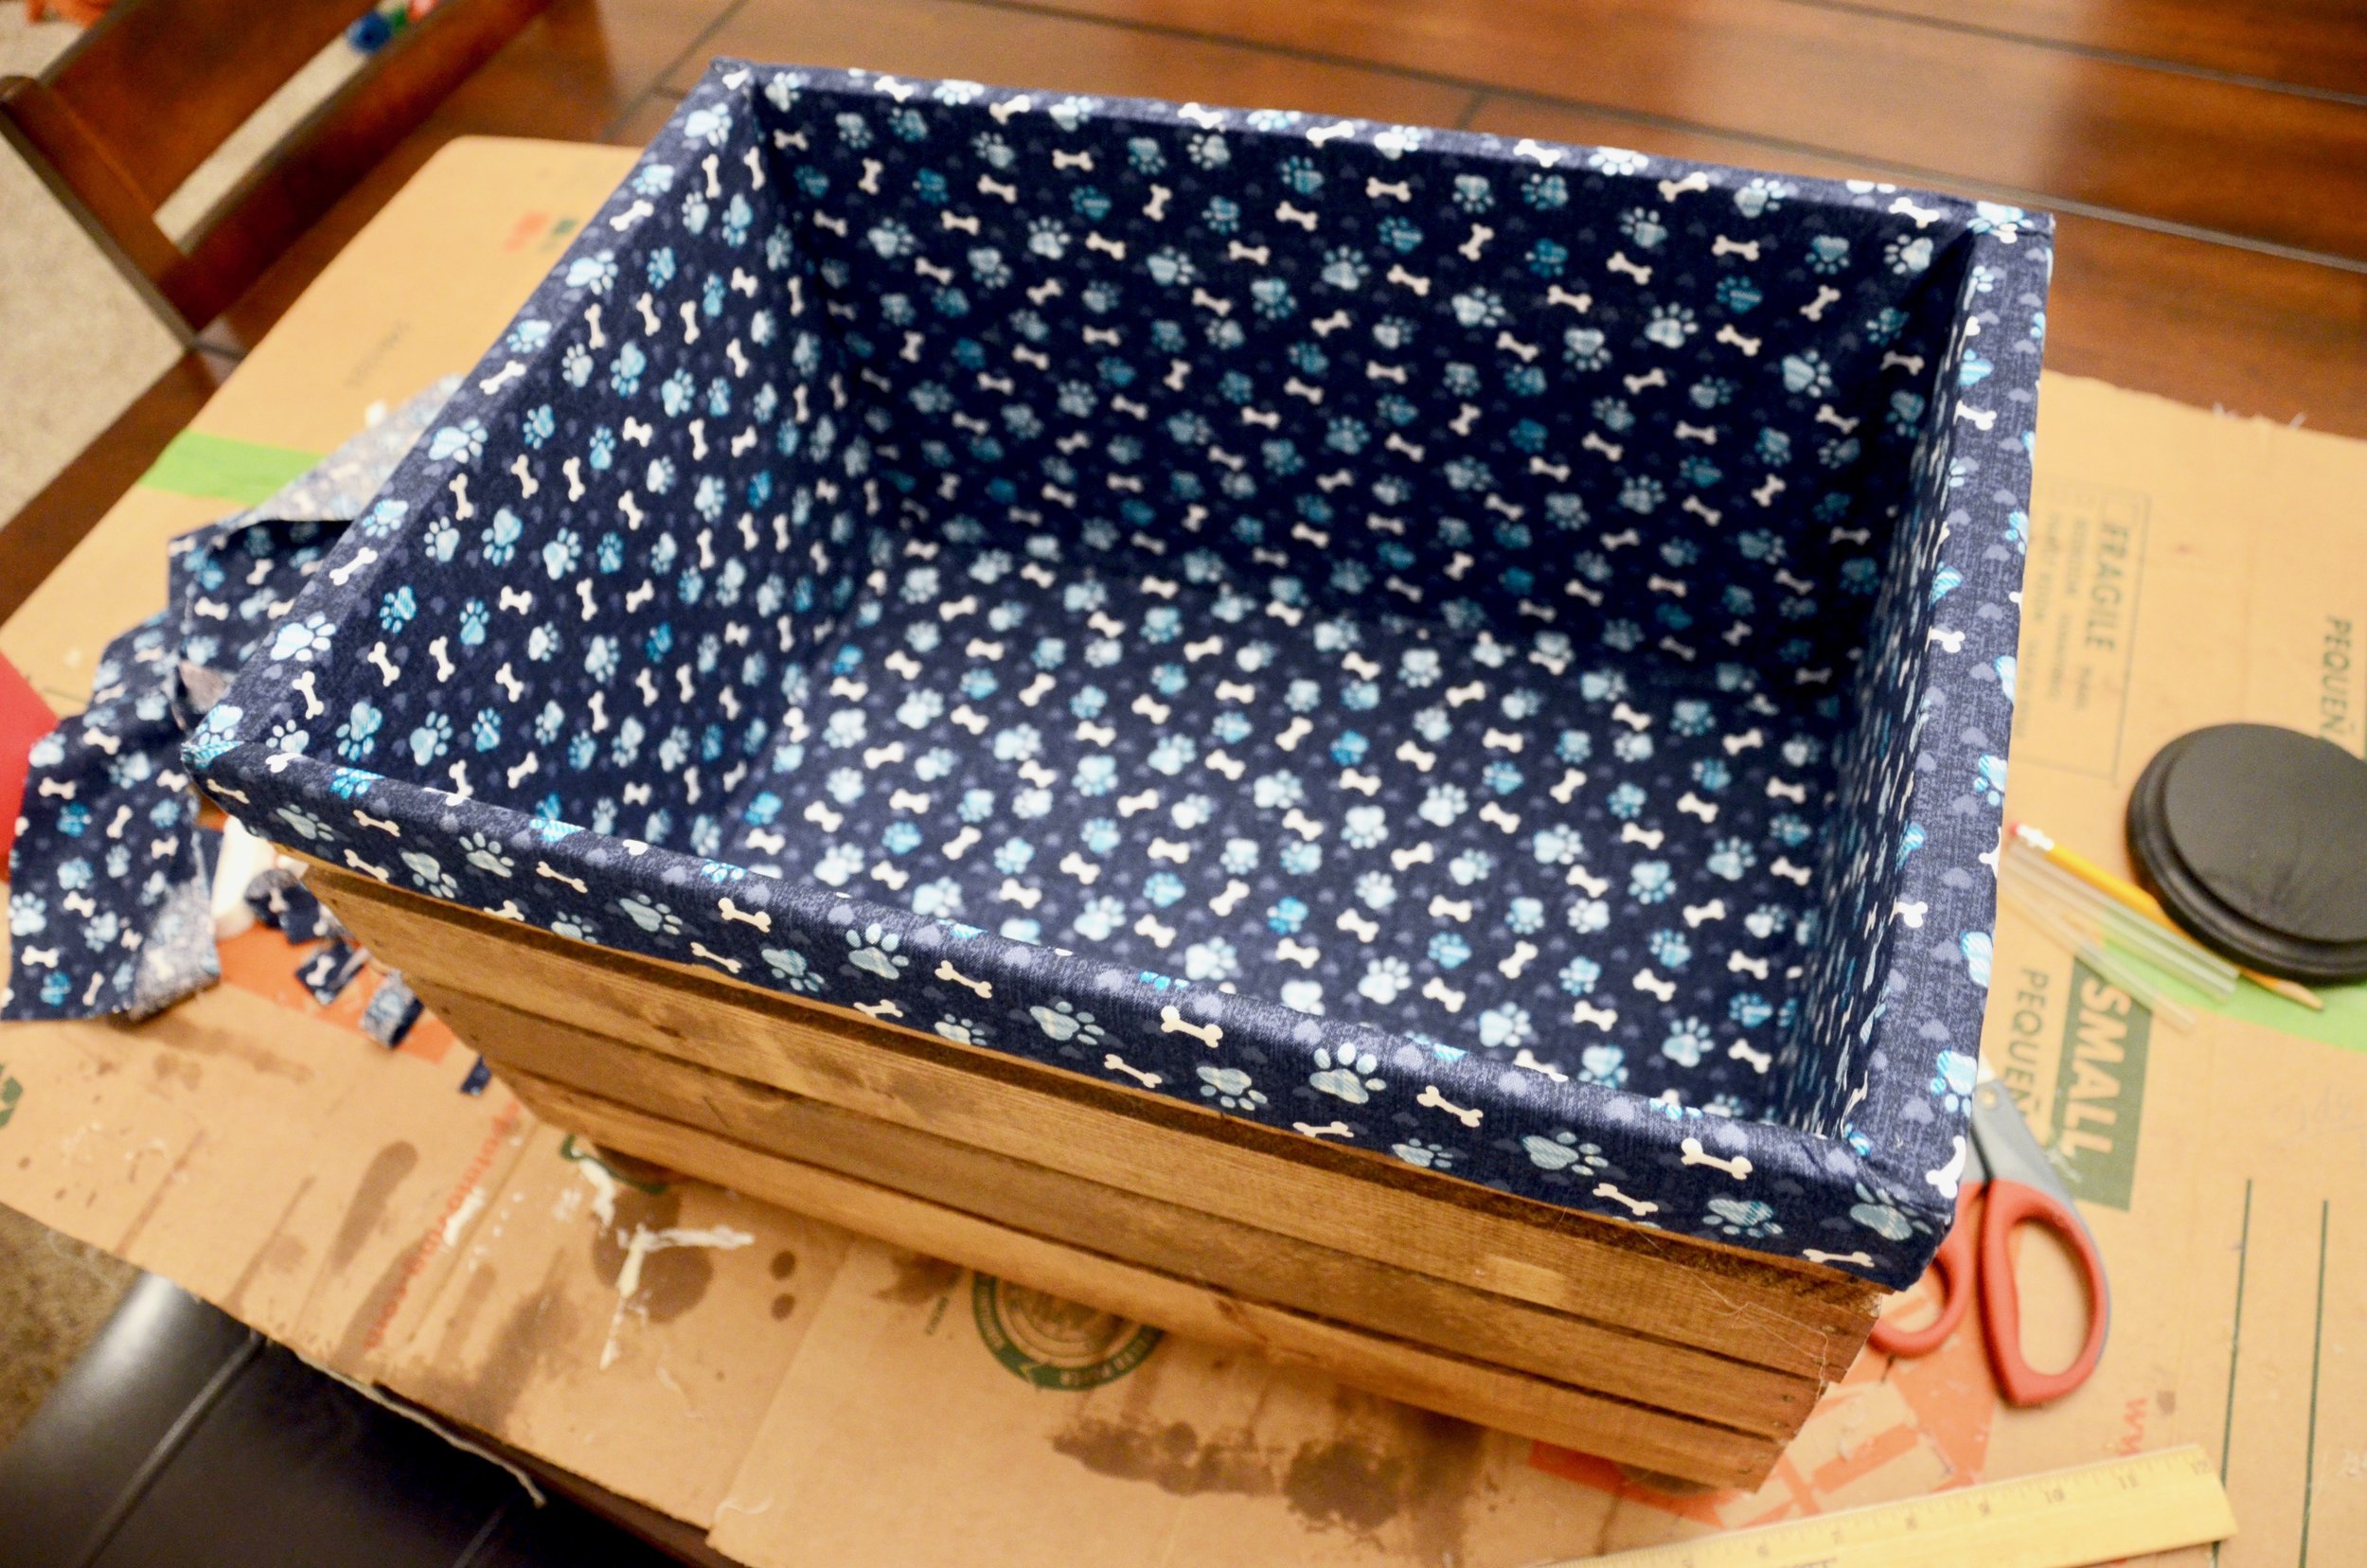
Begin by cutting a 22" x 15" piece of fabric for the bottom of the crate. Fold over each side approximately 1" so the edges are folded and no stray strings can be seen. Use the hot glue gun to glue the edges of the fabric together then glue the whole piece to the bottom of the crate.
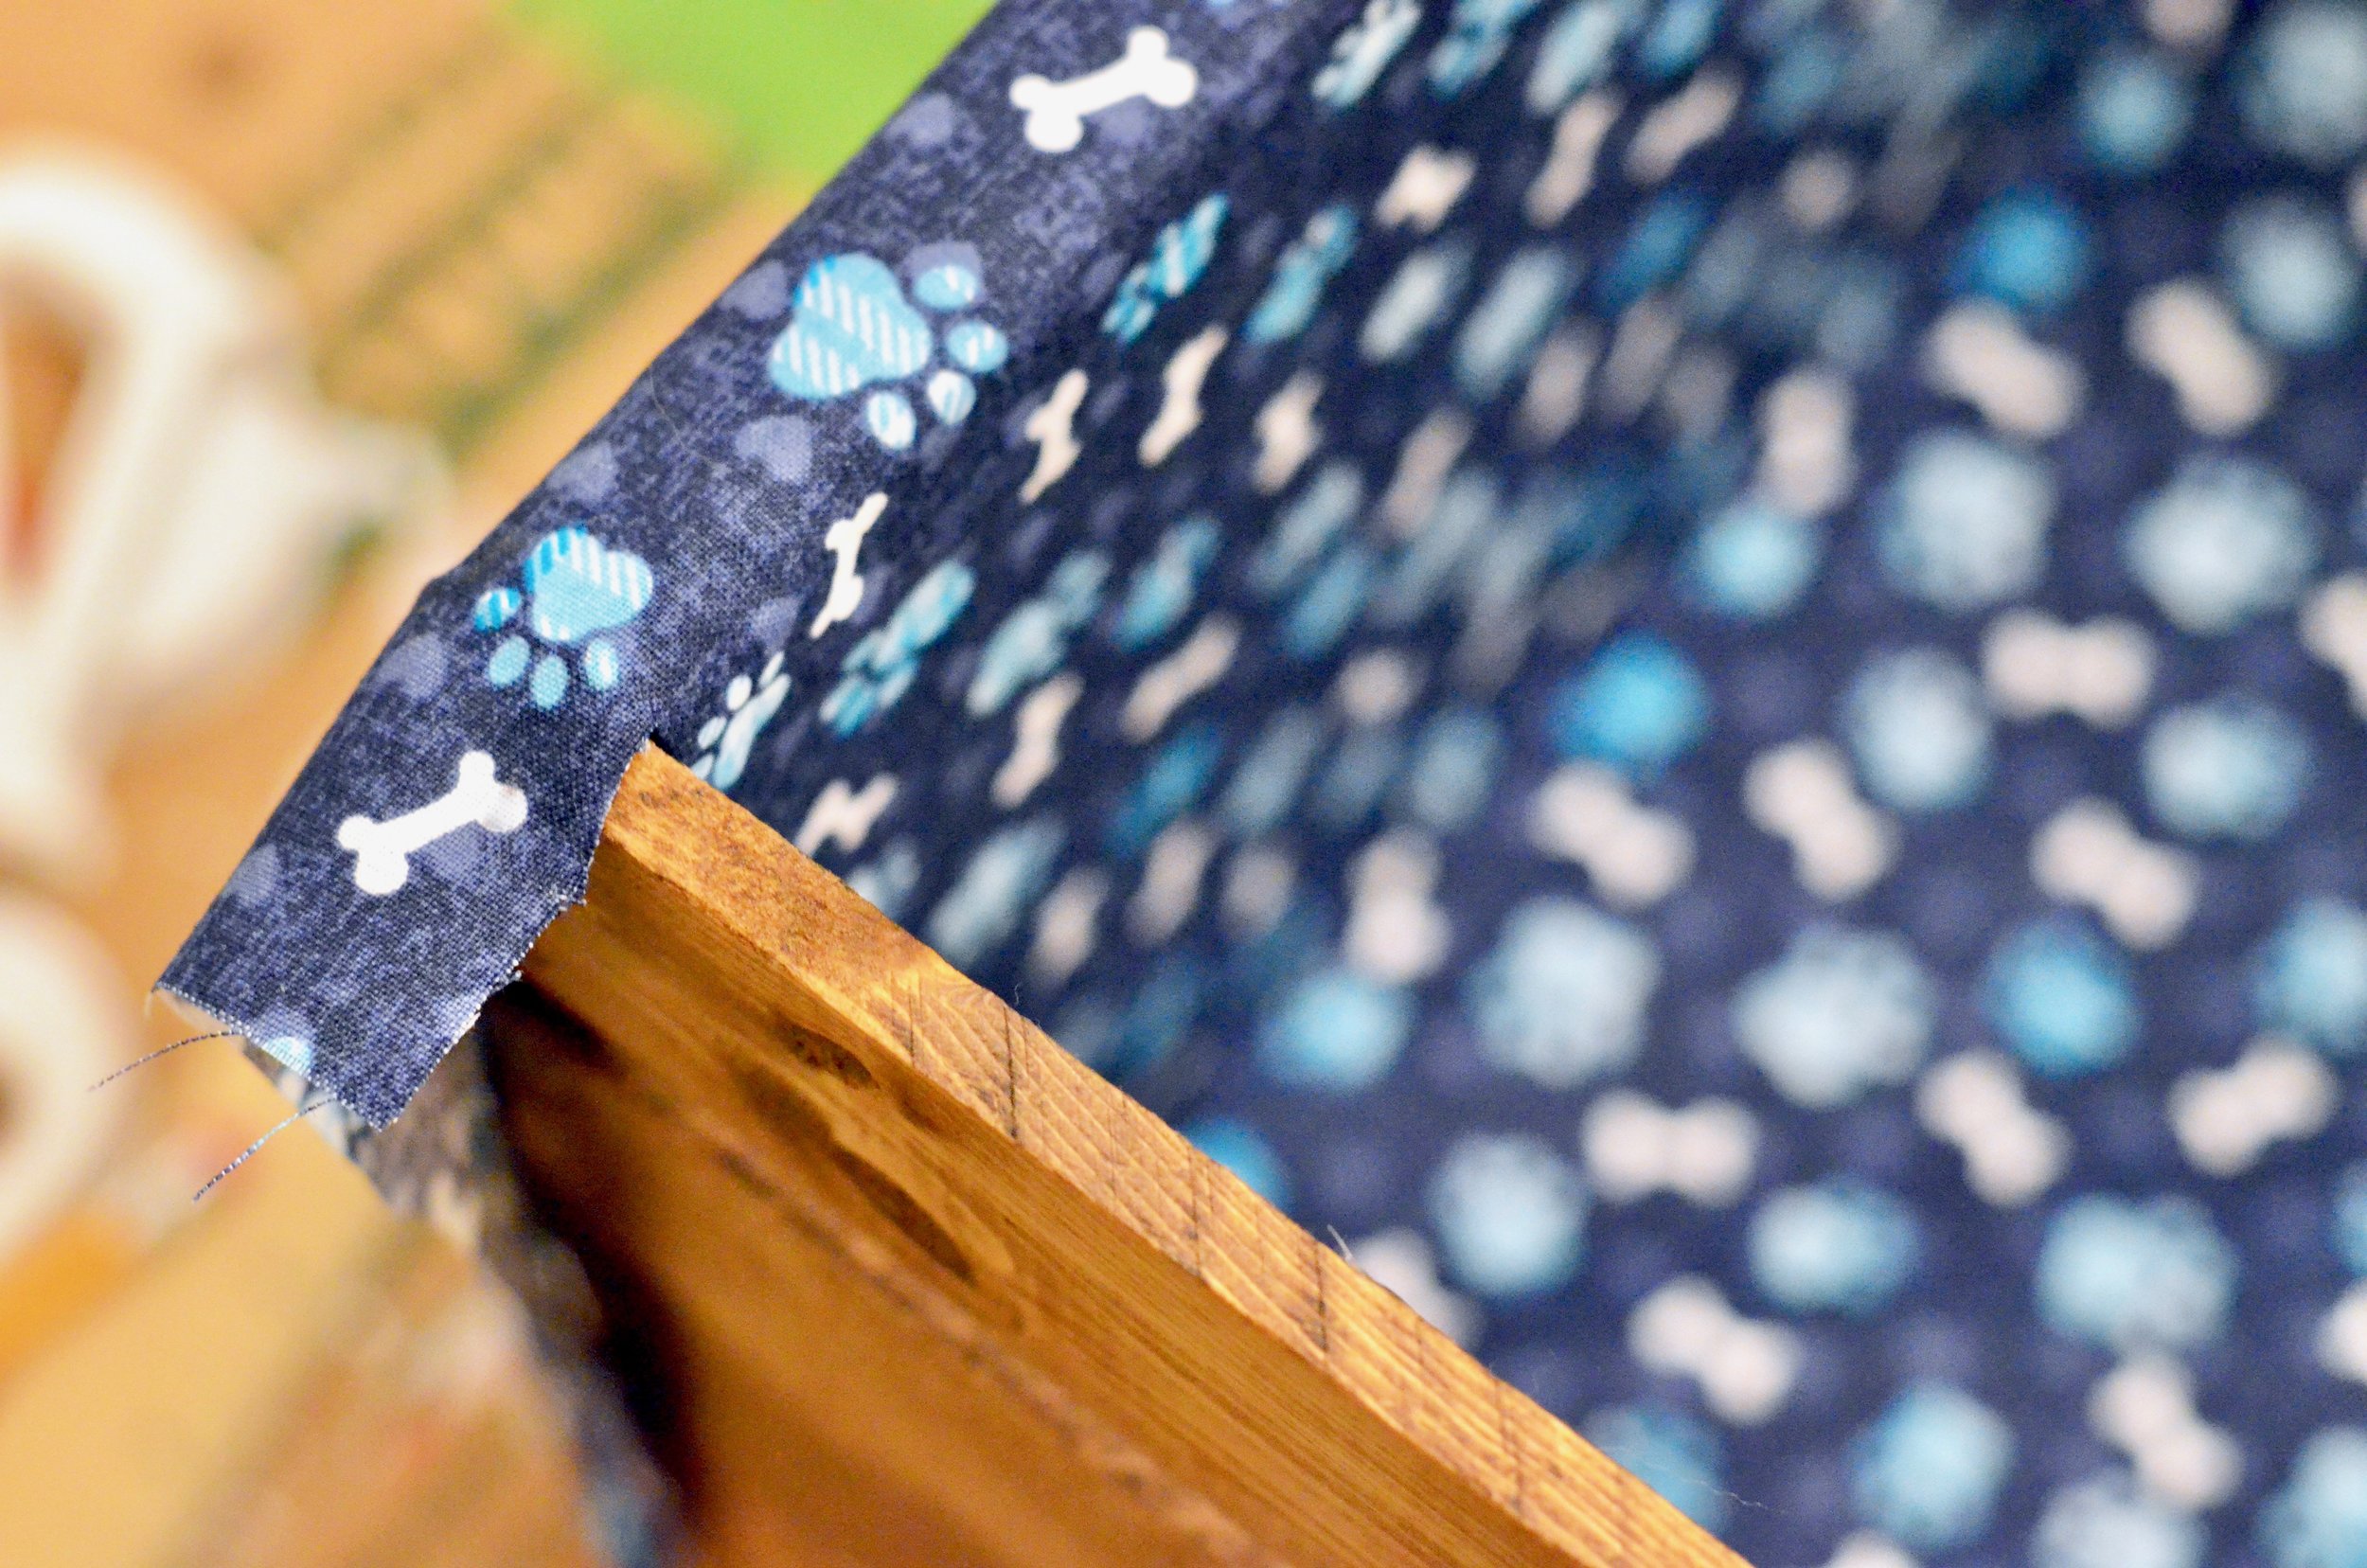
Next, cut two 15" x 15" pieces of fabric to line the smaller sides of the crate. Again, fold over each side approximately 1" so the edges are folded and no stray strings can be seen. Use the hot glue gun to glue the edges of the fabric together then glue the bottom of it inside of the crate. Be sure to overlap the edges just a little bit so there are no bare spots exposed in the creases. Once you get to the portion of the fabric sticking outside of the top of the crate, make a small cut across the fabric even with the top of the box (I know that sounds confusing - just look at the pictures below!!!) With this extra little bit of slack, be sure to cover the exposed crate around the perimeter entirely with fabric. On top, glue the fabric down once you have folded it to be even with the edges of the crate. On the side, leave some overhang so it looks like the fabric is folded over the top of the crate like a fitted sheet. Stop the fold just above the handle and glue it evenly across the side. Complete this step for the opposite side, as well.
Next, cut two 18" x 15" pieces of fabric to line the larger sides of the crate. Again, fold over each side approximately 1" so the edges are folded and no stray strings can be seen. Use the hot glue gun to glue the edges of the fabric together then glue the bottom of it inside of the crate. Be sure to overlap the edges just a little bit so there are no bare spots exposed in the creases. Once you get to the portion of the fabric sticking outside of the top of the crate, make a small cut across the fabric even with the top of the box. With this extra little bit of slack, be sure to cover the exposed crate around the perimeter entirely with fabric. On top, glue the fabric down once you have folded it to be even with the edges of the crate. On the side, leave some overhang so it looks like the fabric is folded over the top of the crate and be sure to make it line up evenly with the overhang you already glued down on the small sides. Complete this step for the opposite side, as well.
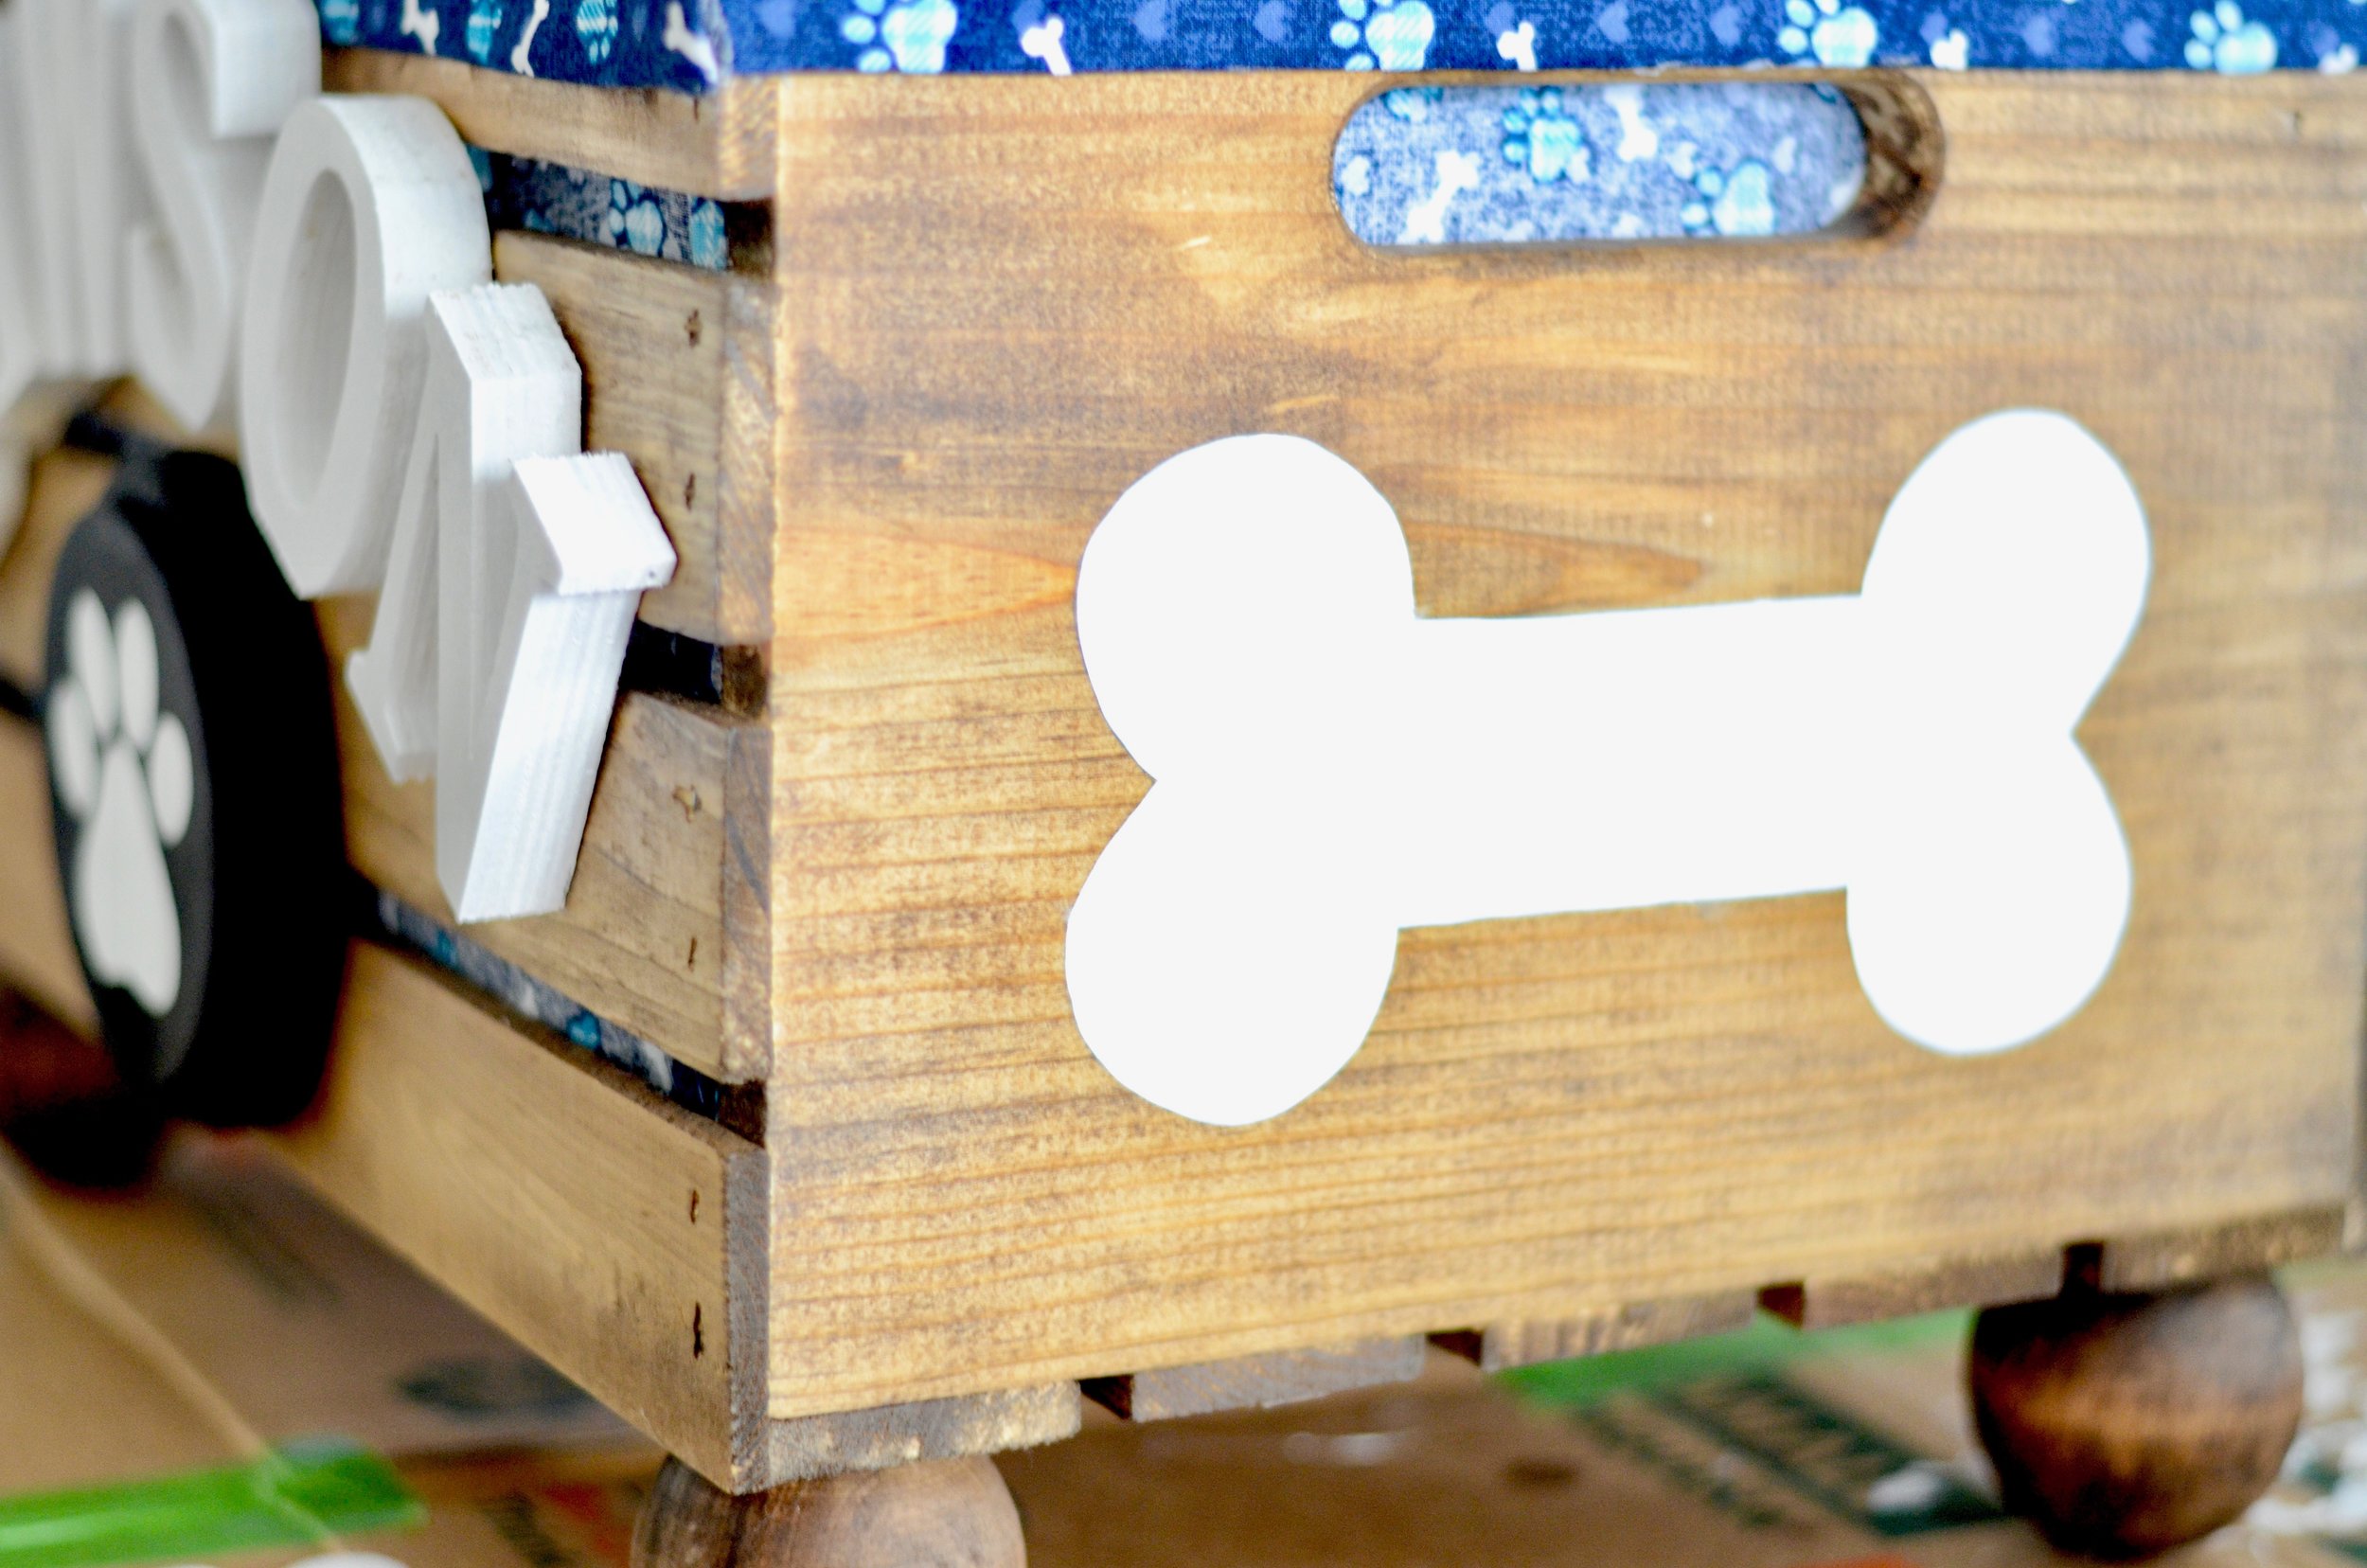
On one side of the crate (one of the long sides), glue the letters in a half circle formation (like a rainbow) using a hot glue gun.
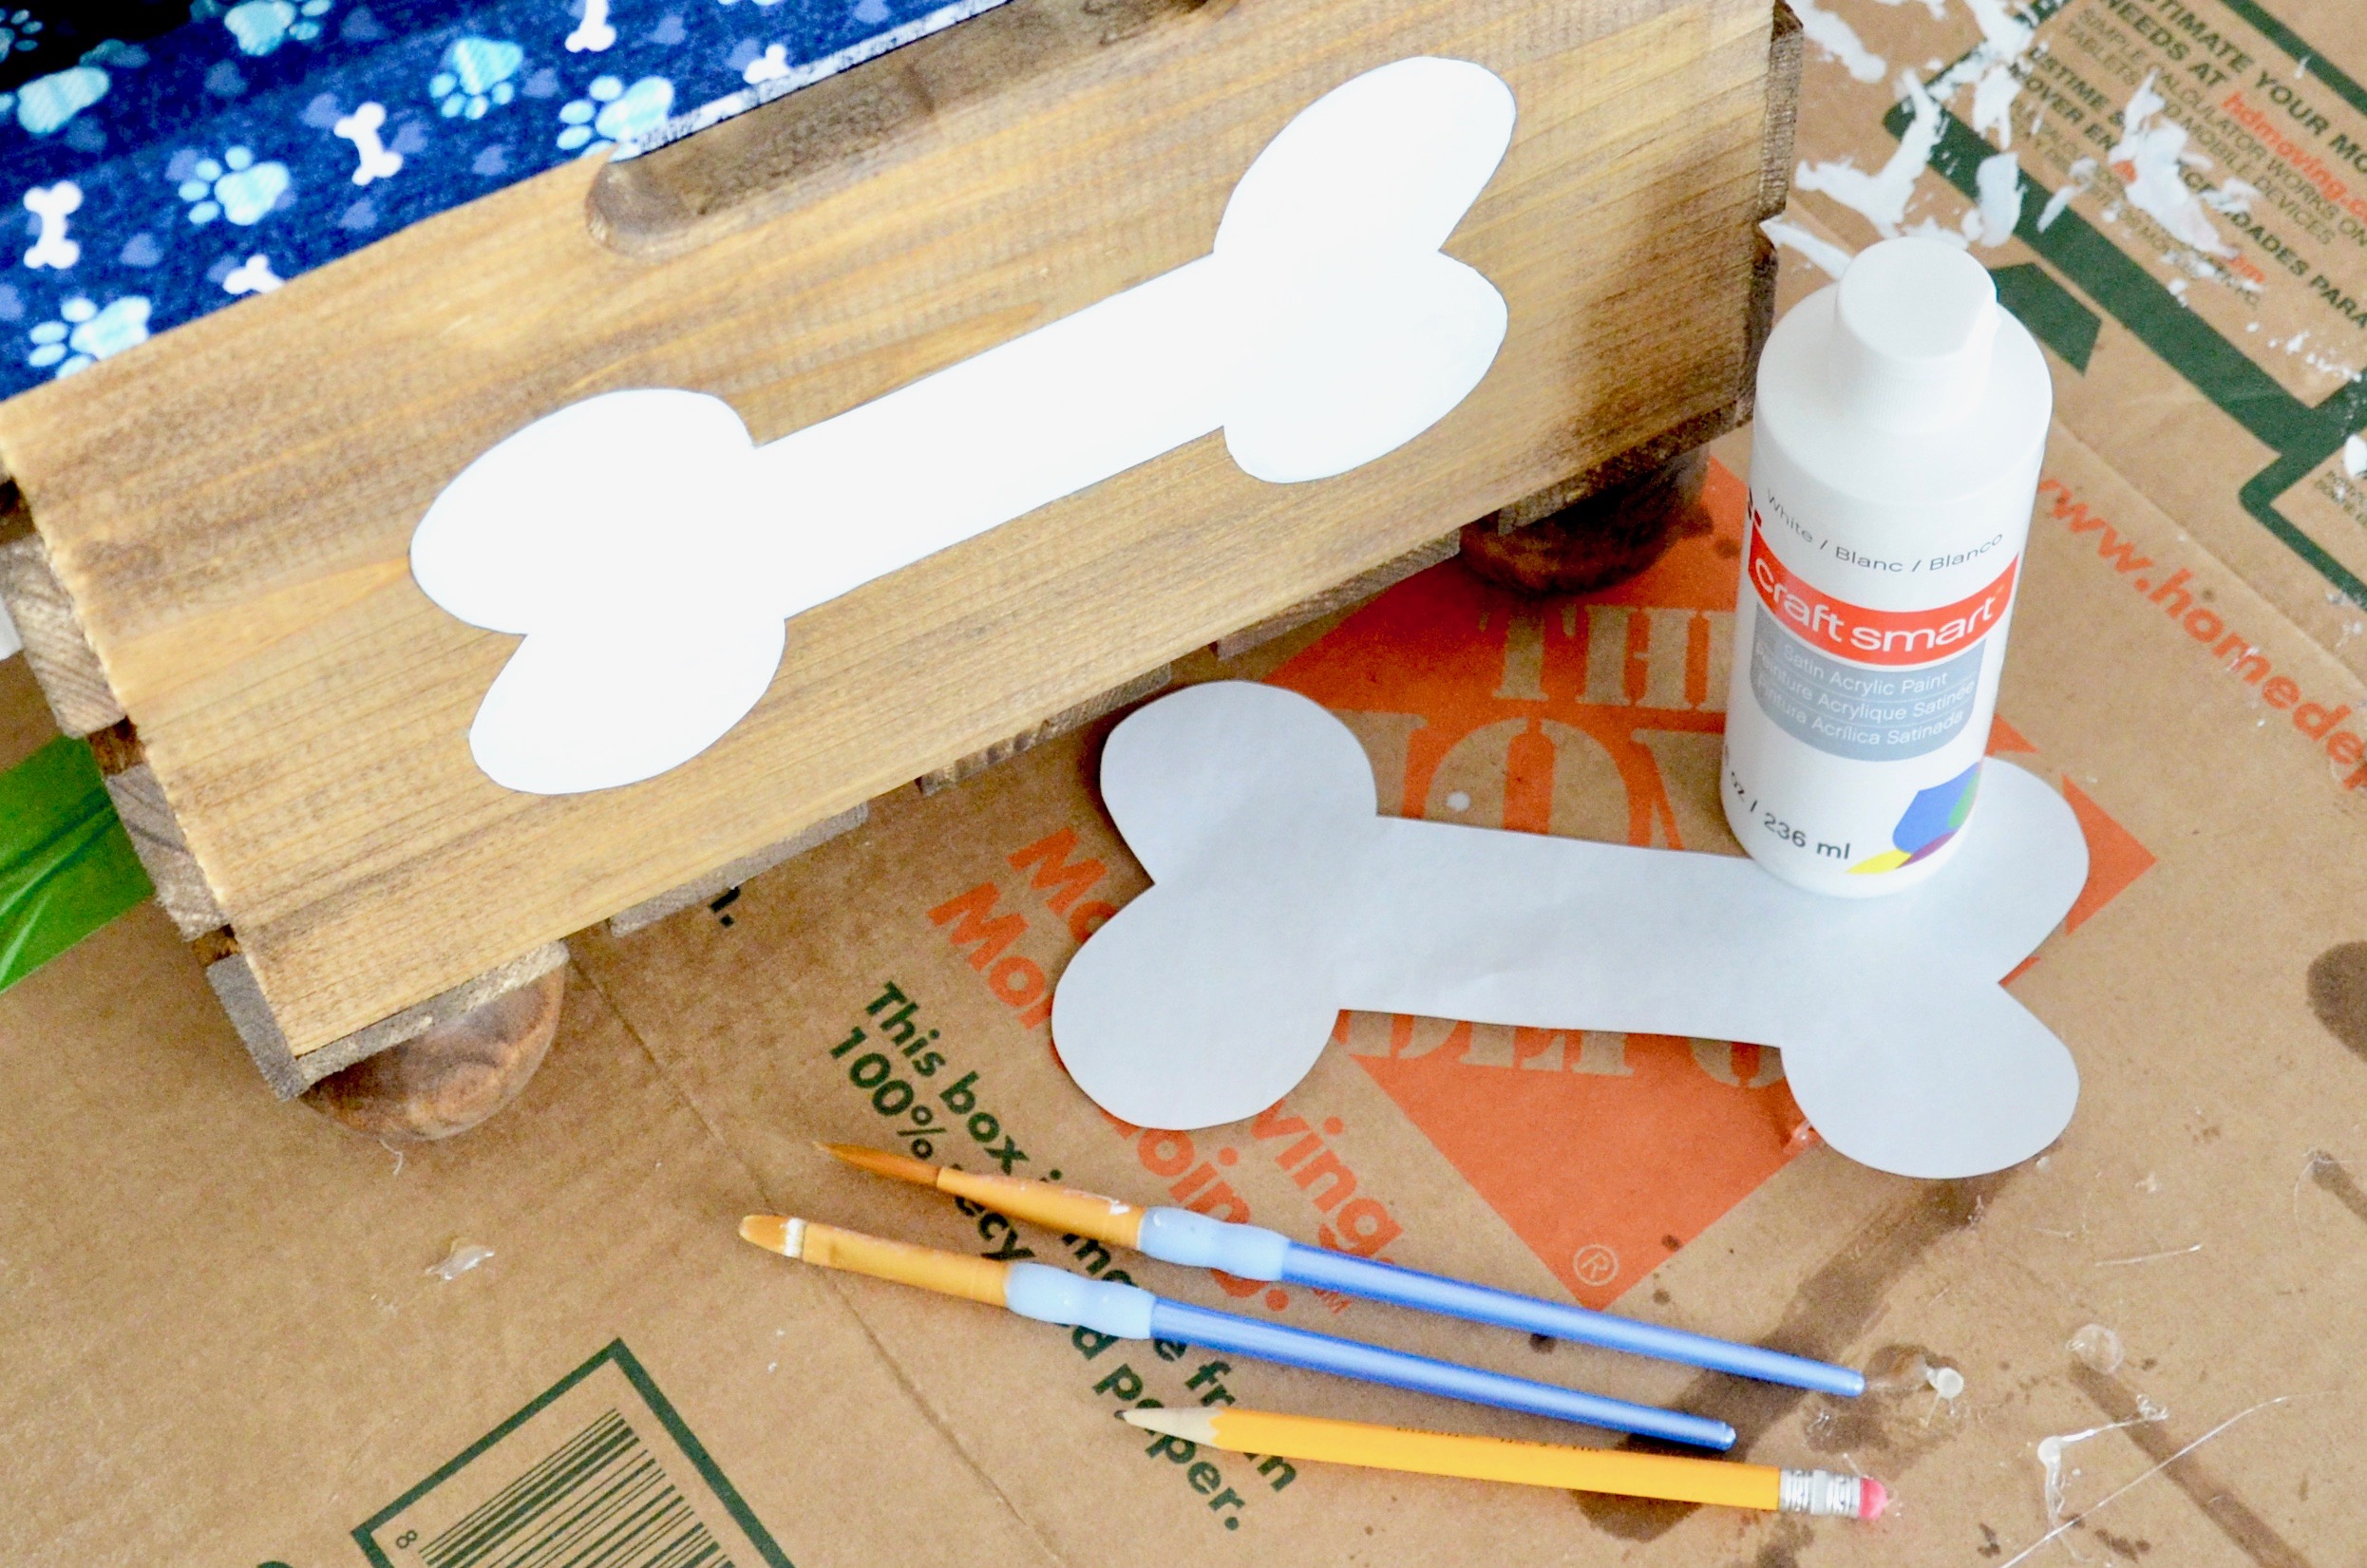
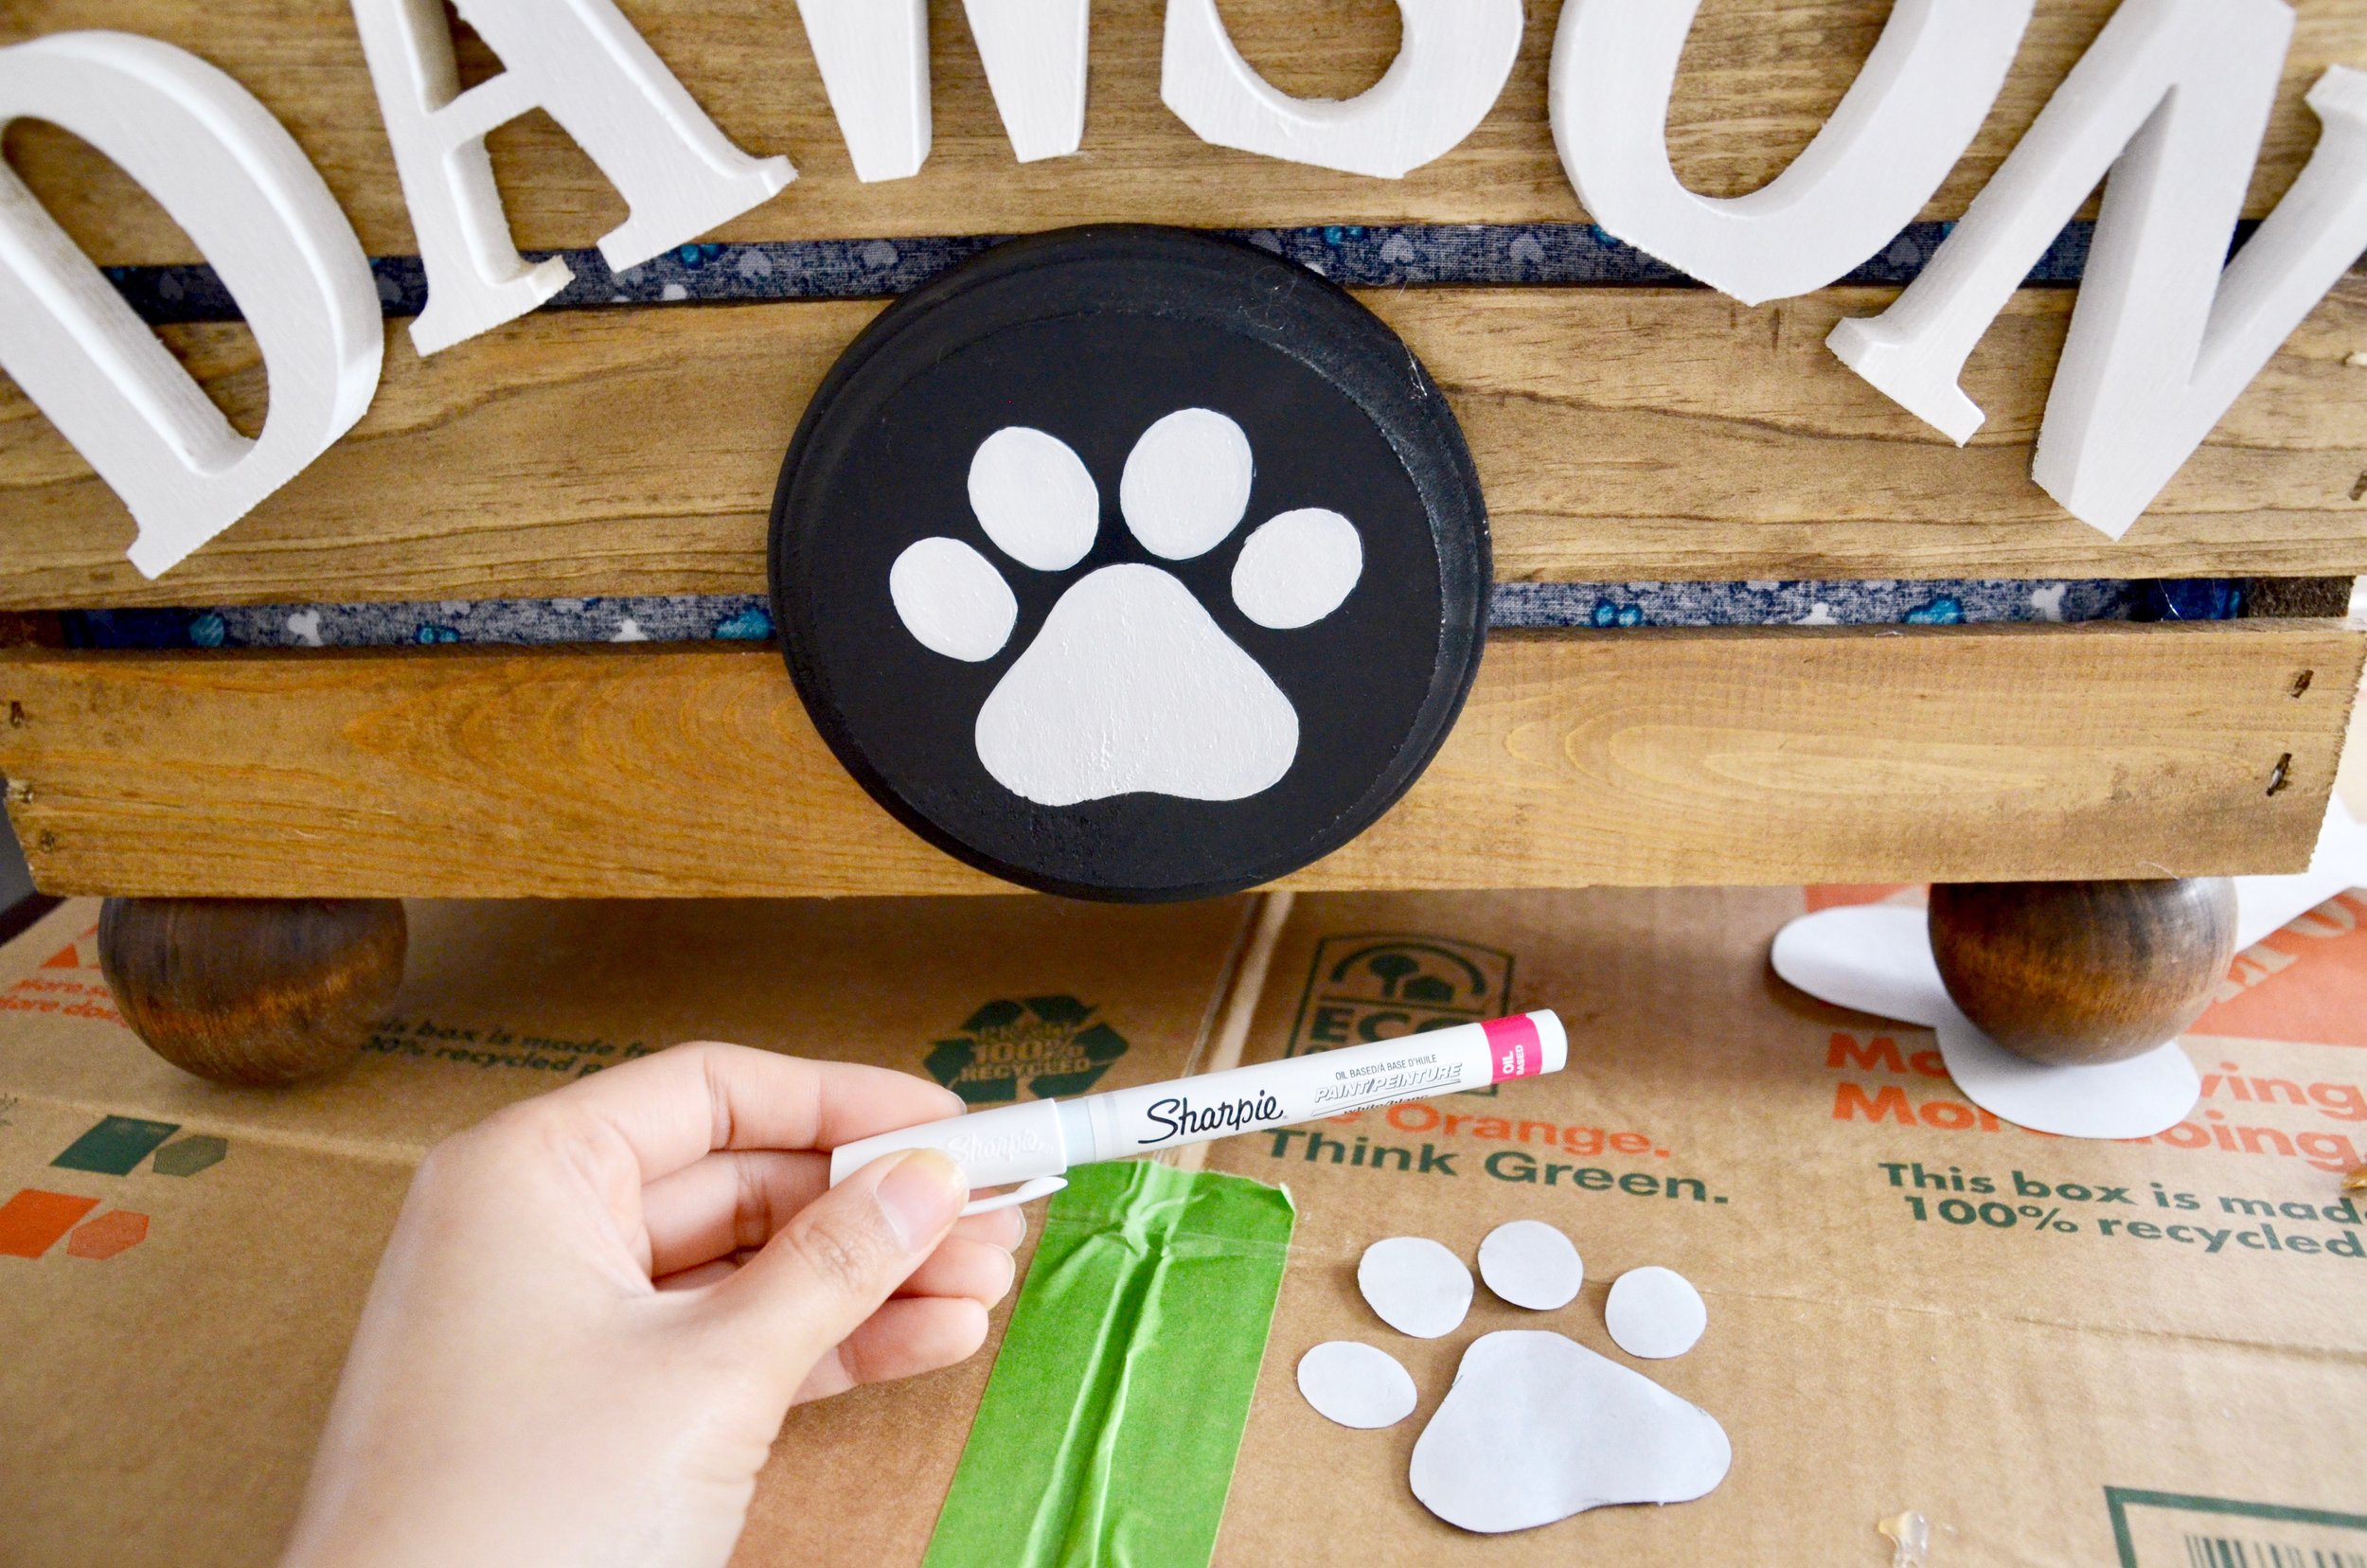
Directly under the letters, glue the black plaque using a hot glue gun. Then, using the smallest paint brush, paint a paw print on the plaque with four small circles at the top and one bigger circle centered underneath them to form the paw. First, I drew the paw on a blank sheet of paper, cut out each piece individually, traced them on the crate, then painted inside my tracings. Because the paw is so small and intricate, I used a white sharpie marker (fine point - and make sure you use the oil-based kind specifically for wood) to outline the edges for precision.
On each of the short sides of the crate underneath the handles, paint a dog bone. Again, I drew the dog bone on a blank sheet of paper, cut it out, traced it on the crate, then painted inside my tracing. Complete this same step for the opposite side.
Now, all that's left to do is add your pup's toys in the crate!
(Sometimes I'm really bad at trying to explain things, so just let me know if you need clarification for any of these steps!!! Hopefully the pictures are helpful!)


I hope you enjoyed this DIY and can replicate it to create a fun, customized toy box for your pup! If you decide to try it out and would like to be featured on this post, be sure to send me some pictures of your creation! :)
Features: